This was a repair that I was warned about on the day of the survey. The
cockpit locker covers are completely water-logged, and the wood inside is
obviously rotten.
While this isn't an issue right now, as the fiberglass is still in good
shape, when the wood gives out, the fiberglass will crack, and then be very
difficult to repair.
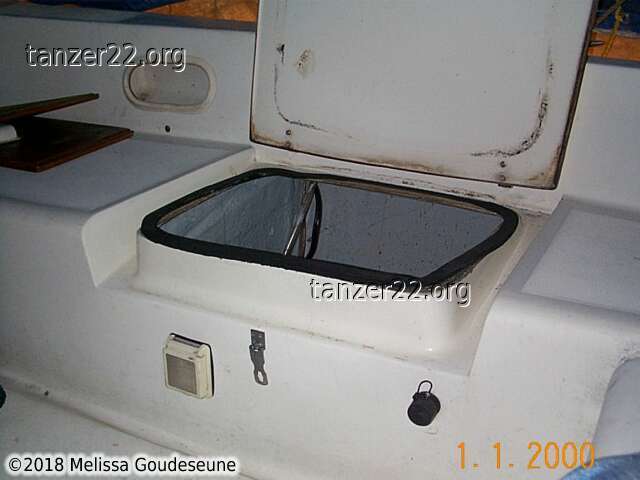
Here are two photos of the locker covers that show them starting to crack
apart at the edges:
You can also see the gasket that has significantly degraded. When I
replace the gasket, I will install it on the bottom surface of the cover,
so it swings up and out of the way when the cover is open, and can't be
damaged by putting something down on it.
The second photo also shows the shore-power inlet. I plan to install the
two circuit-breaker boxes in the stbd cockpit locker, against the foreward
bulkhead, with a splash guard to keep spray and rain off them.
Well, I finally got "a round tuit", and removed the locker covers. The new
gasket will be installed on the lid instead of the seat, so I needed to
mark where the gasket will sit. This involved climbing inside the cockpit
lockers with some severe yoga being practiced on my legs, and using a
sharpie marker to trace the outline of the opening. Then, since the inside
of the lid is to be sliced open, I need a template to mark where the gasket
will be, once I've finished reconstruction.
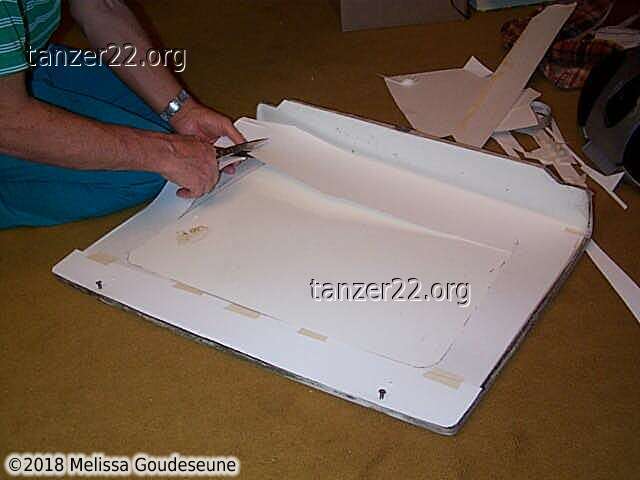
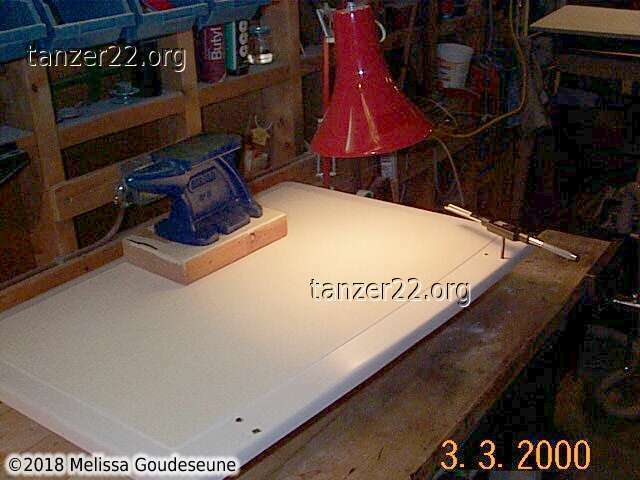
This is a photo of my Dad making the template using a sheet of bristol
board. The cardboard is anchored at the hinge holes using two screws,
which will make it easy to align on the new cover.
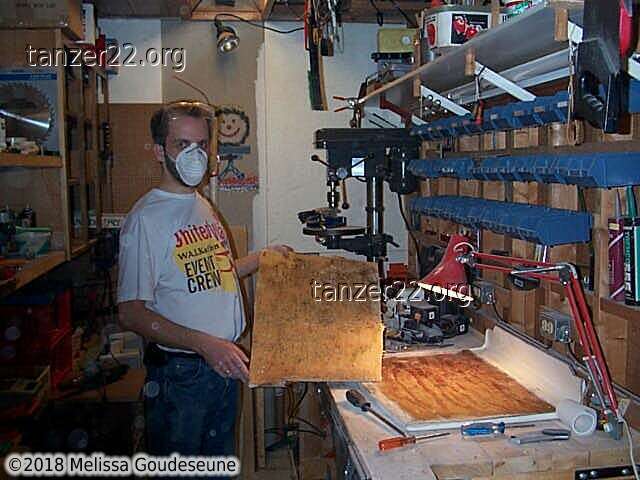
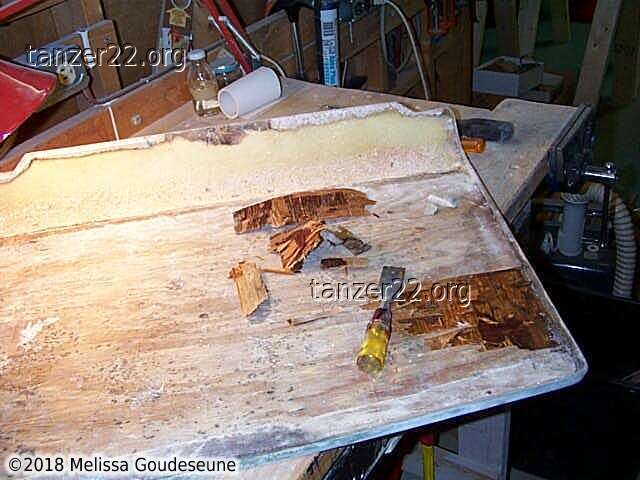
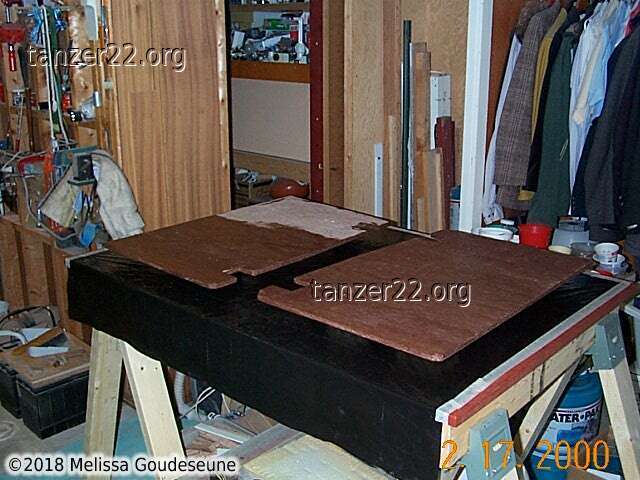
This next sequence of photos shows the removal of the inside gelcoat of the
covers. Honestly, I hope this is a part of your Tanzer you never have to
see. The inside gelcoat and roving was about 3mm thick, and was removed
using a cut-off wheel in a Dremel moto-tool. As you can imagine, the dust
was something to behold. Eye protection is also a must, as the cut-off
wheels can and do disintegrate with gusto. I found one piece of the
wheel that flew 15 feet across the room and was sitting on the clothes
dryer.
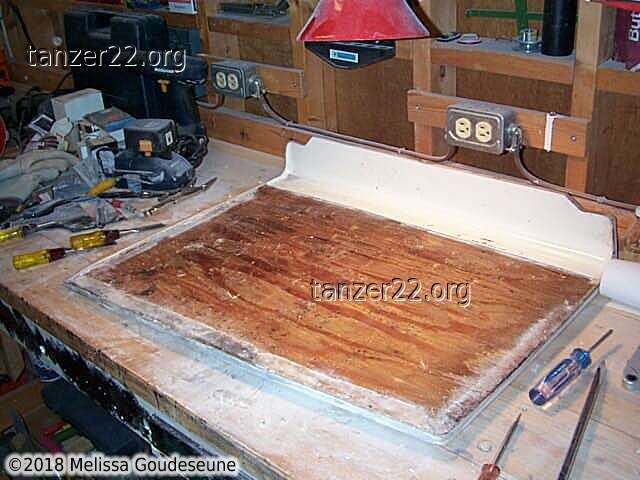
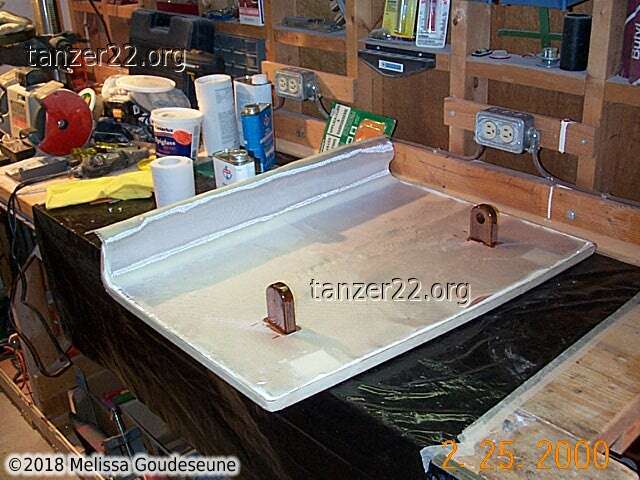
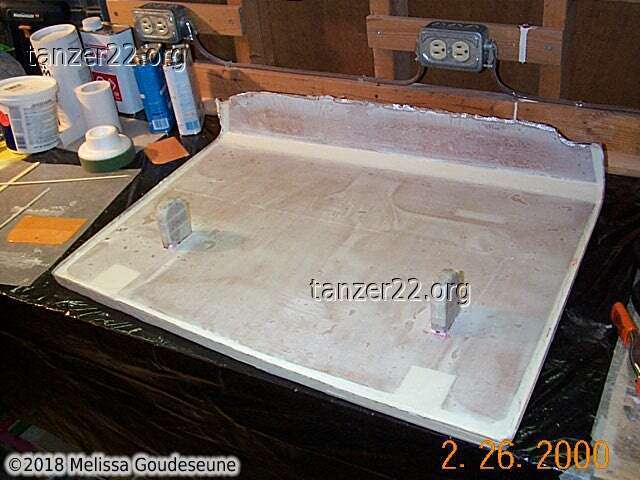
With the inside gelcoat removed, you can see the voids in the gelcoat, as
well as how wet the wood was.
The next operation was removing the wood, which was accomplished through
careful use of a chisel to pry out the plywood, one layer at a time. The
bottom layer (next to the top fiberglass) peeled right off -- it had no
bonding to the glass anymore! It's now apparent to me how the fiberglass
can crack, and how difficult it is to fix, especially on the boat. This
was hard work on my workbench, let alone working overhead on the boat.
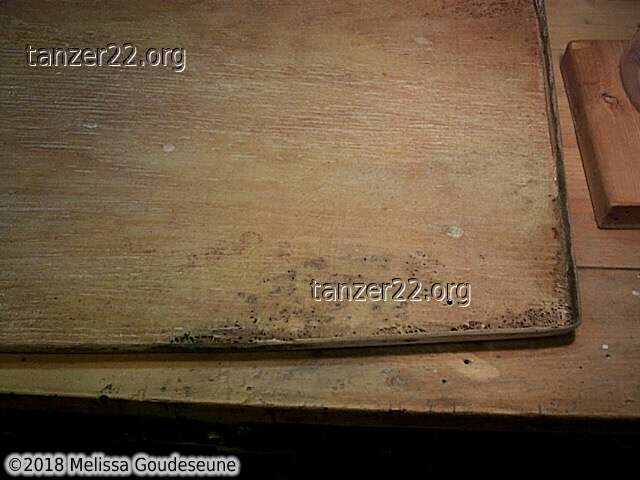
The lids will require some restorative work before I put in the new plywood
core. On these photos, you can see where the roving did not fully wet out
before the core was installed. These areas will be filled with epoxy and
allowed to cure before the new core is installed.
Next on the list is to open up the second locker cover, and then start
reconstruction. Of particular note is the front flange of the locker lids.
I had thought the front edge would be cored. Not so! It was dead air
space, with window-type caulking around the edges. In fact, this caulking
was used on all the edges of the covers. When the caulking degraded, it
allowed water ingress, which then rotted the entire core. I plan to
install core on the front face, as I don't have the facilities for
installing roving and gelcoat on the inside surface.
Reassembly
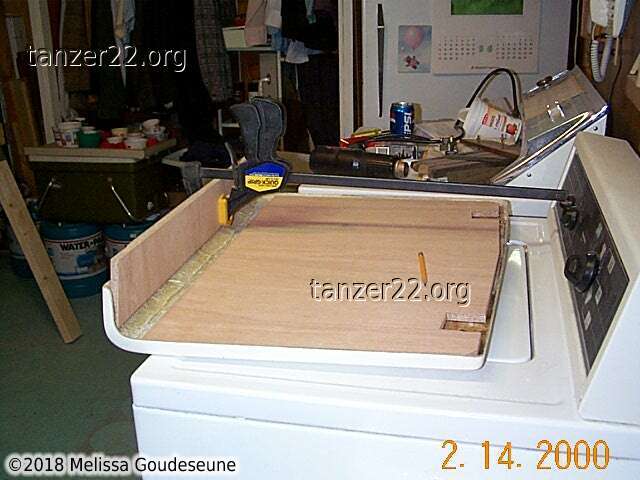
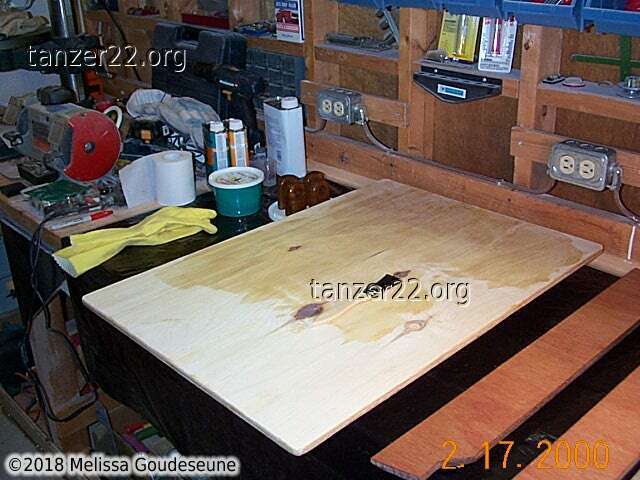
The first part of rebuilding the locker covers was cutting the new core.
For this purpose, I bought a half sheet of 1/2" Meranti ply from
Noah's Marine. This is 9-ply marine
plywood, and is an absolute joy to work with. As above with the locker
opening, my Dad made a template for the size of the wood. It was just too
complicated a shape to measure accurately.
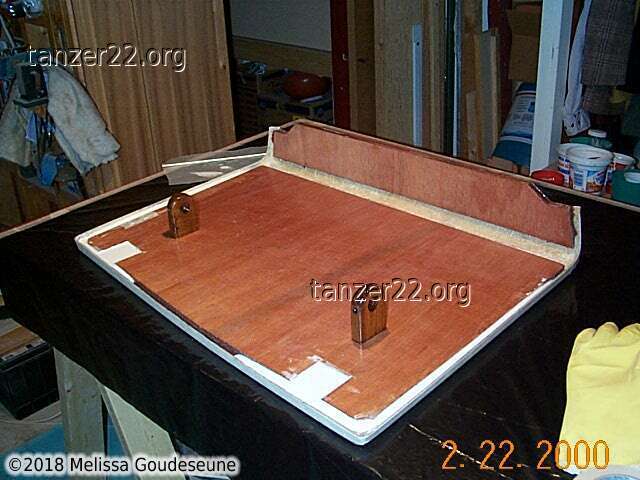
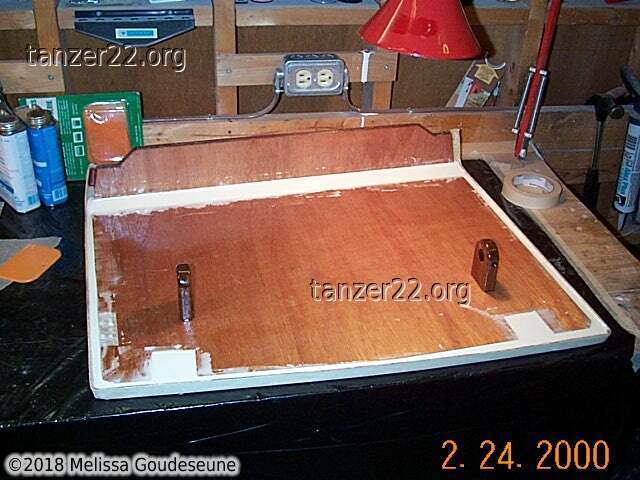
Here you see two photos of the lids. The cutouts at the back edge are for
the hinges. I put a 2" by 2" notch in the plywood, which will be filled
with thickened epoxy. This will prevent water ingress to the plywood
through the hinge holes. When I re-drill the holes, I'll make them
slightly undersize and tap the epoxy for the #10-32 screws I bought. The
photo on the right also shows the QuickGrip clamp I'm using to hold the
(new) front core, to mark the notches on the sides. The covers never had a
cored front before, so this should significantly strengthen them.
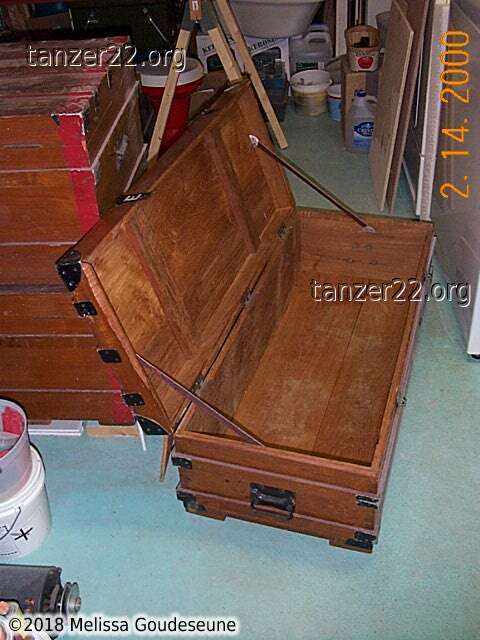
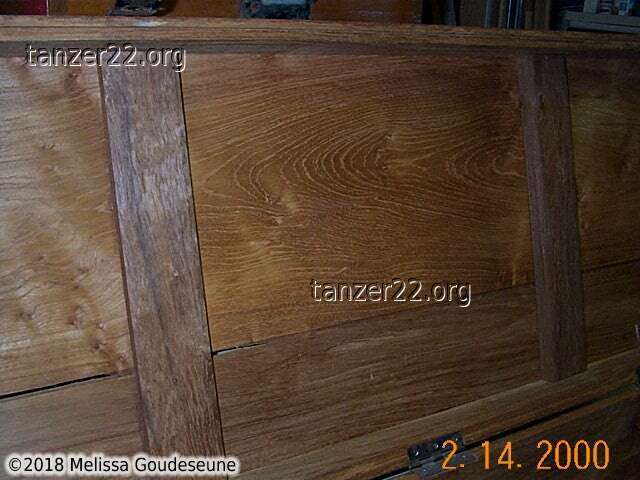
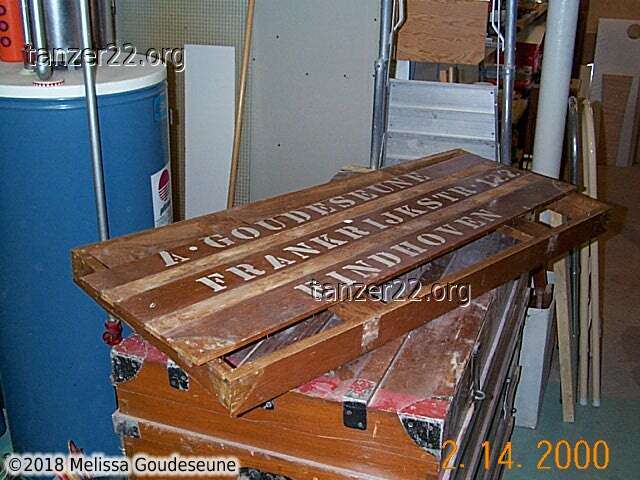
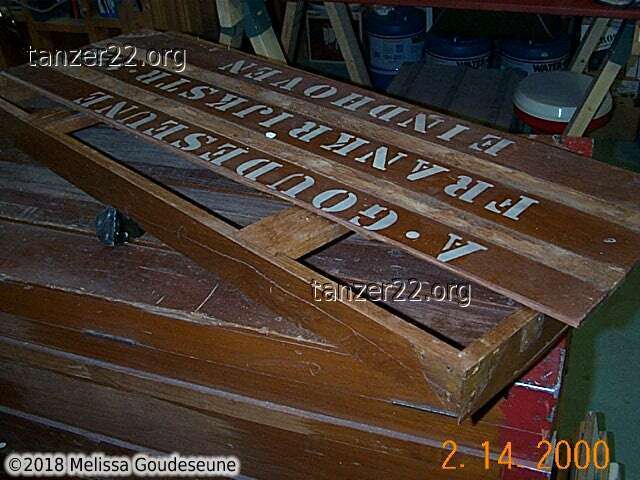
A real find: cheap teak!
Ok, this counts in the lucky beyond all belief category. 40 years
ago, when my Dad was traveling all over the Middle East doing seismic oil
exploration for Royal Dutch Shell, he had these teak chests made to store
all his stuff. Through an administrative snafu, they ended up being billed
to him instead of to the company. That was 1,000 Dutch Guilders back in
1959 -- a lot of money. Well, you win some: I figure that the
smallest of the 3 chests is worth cdn$600 in teak. The sides of the chest
are solid 1x10 teak, almost three feet long. Jealous yet?!?
Oh, the final bonus about the chests: they were made with excellent
craftsmanship. No glue at all. They used dovetailed corners and joints,
with nails to hold everything together. A real pleasure to work with.
Sniffing Glue (aka Fun With Epoxy)
As my friend Peter said to me, you'd have to be sniffing glue to believe
that a boat is an inexpensive hobby.
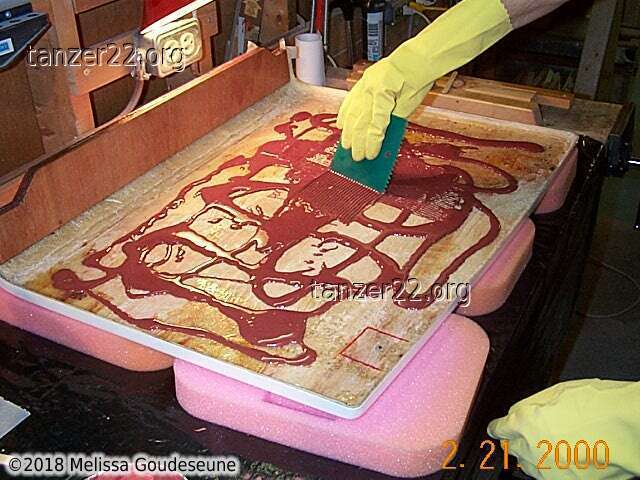
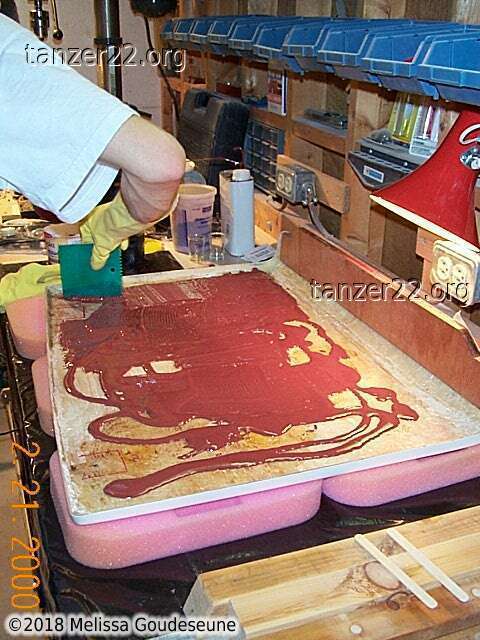
Fortunately, I have an enviable workshop that has made working on these
locker covers possible. These photos show the wood for the covers being
sealed with S1 epoxy sealer. I ran out of mixed epoxy in the second photo,
and figured I'd update the webpage while waiting for the next batch to mix
properly.
A couple of tips about epoxy and where to buy your supplies:
At the marine store, buy S1 Sealer. This is a water-thin epoxy with a
48-hour pot life (!) designed for waterproofing wood. It soaks in very
well, and doesn't need to be sanded between coats, if you recoat within 24
hours. Also buy your microballoons here (for thickening epoxy), as it tends
to be hard to find elsewhere.
The marine store is also the best place to buy epoxy. I used to recommend
Bondo epoxy, until I ran the numbers and found out it's MORE expensive than
the better epoxies such as EAST System (which is what I use now).
At your local party-supply store, buy plastic cups for mixing the epoxy.
The hard, clear plastic ones tend to be better. Stay away from the
milky-coloured flexible ones. Also, 2-ounce plastic shot glasses are
ideal for measuring quantities to mix, or to mix up an ounce of
epoxy for a little repair. Also buy a package of bamboo shish-kebab
skewers here. They're small enough for mixing small quantities of epoxy,
and are way cheap.
At your local craft store, buy a 150-pack of popsicle sticks. This is for
mixing larger amounts of epoxy, or for mixing in microballoons to thicken
the epoxy.
At a specialty wood store (like
Noah's
Marine), buy any other fiberglass bits you need, like a plastic trowel
or fiberglass cloth. This is also the place to get your marine ply -- Home
Depot won't carry anything close to this quality. Compare: from Noah's,
their cheapest 1/2" ply is 9-layer, all voids filled, for cdn$37 (half
sheet). From Home Depot, their 1/2" ply will be 4-layer, surface voids
filled only, and will probably still set you back $15 or $20 (half sheet).
That's my advice for maximizing your repair dollar -- stay away from your
local marine chandlery for at least your disposable fiberglass supplies!
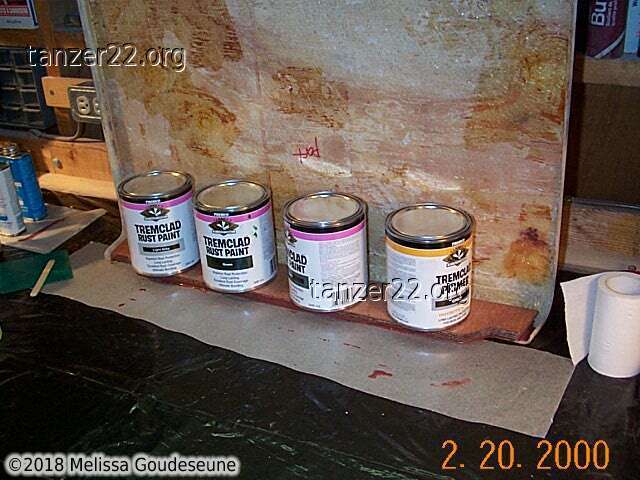
Gluing it all together
Here you can see the new core of the front face being epoxied into place.
Previously, there was air and caulking in this part of the cover. Now it's
1/2" epoxy-sealed marine ply, glued in with thickened epoxy. Underneath
the front edge is a piece of waxed paper, to keep the cover from gluing
itself to the workbench. You can also see which brand of paint I like to
use.
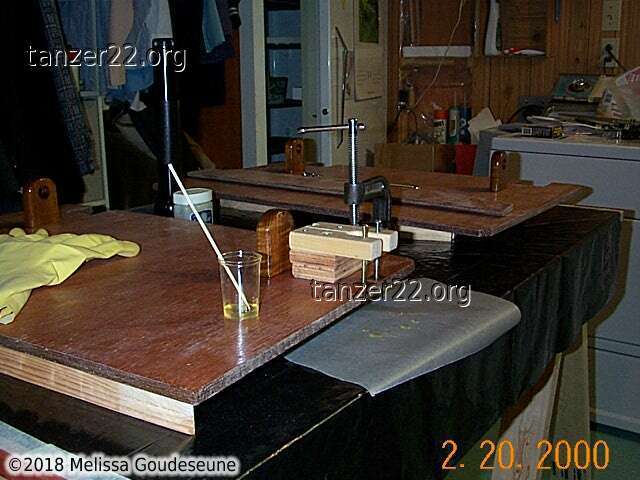
Next is a jig that my Dad made, for the hatch springs (photos forthcoming
once I install the hatches on the boat). I needed a way to suspend the
#8-32 stainless nuts in epoxy, so the spring has a solid surface to grab
against. The wooden jig holds the temporary screws at the right spacing,
and the screw has been coated with vaseline, so it doesn't get permanently
installed on the cover!

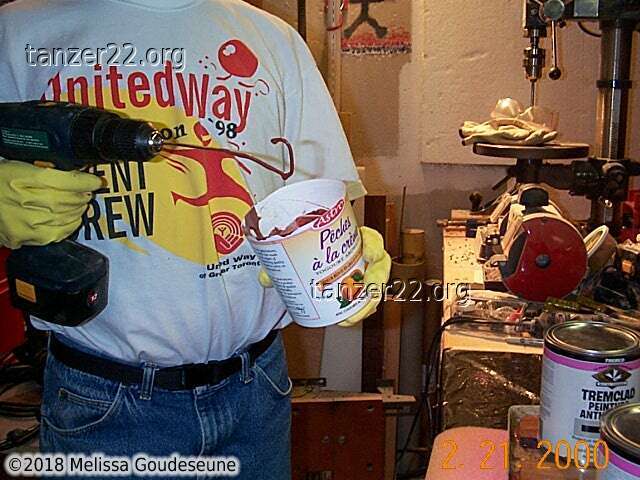
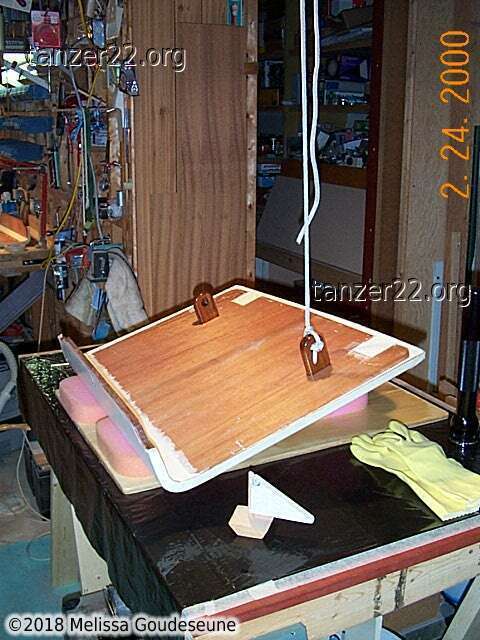
How to mix epoxy without wearing out your arm: use a cordless drill! I
took an 8" piece of 12-gauge copper wire, bent it into the shape of an
eggbeater, and put that in the drill. That made it very easy to mix in the
microbubbles without getting a sore arm the process. For the seat surface,
I mixed 10 fluid ounces of epoxy, and added about 16 fluid ounces of
microbubbles. On the third and fourth photos, you can see the plastic trowel
spreader I used to get an even surface. Also, in the third photo, you can
see the marker outline of the area around the hinge screws, which I marked
to be able to line up the core properly. The last photo shows the paint
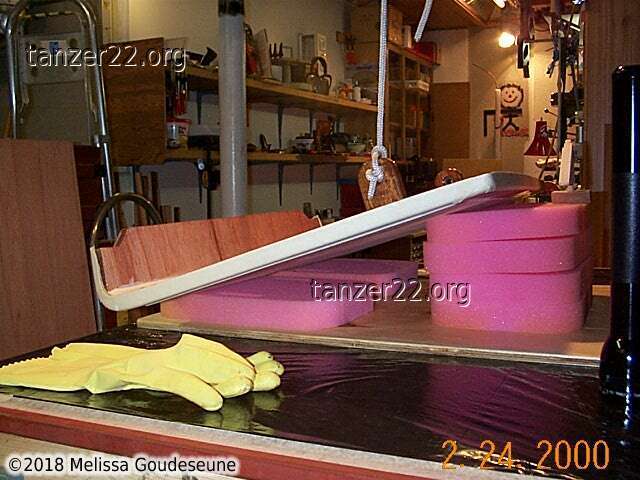
cans weighing down the core. Note that the fiberglass is sitting on foam,
so it will conform to the flat surface of the wood, and prevent voids in
the epoxy.
Filling the edges: I ran out of brown microbubbles, so the next batch of
epoxy was white. Here, I've filled the cutouts for the hinge screws, and
most of the edges.
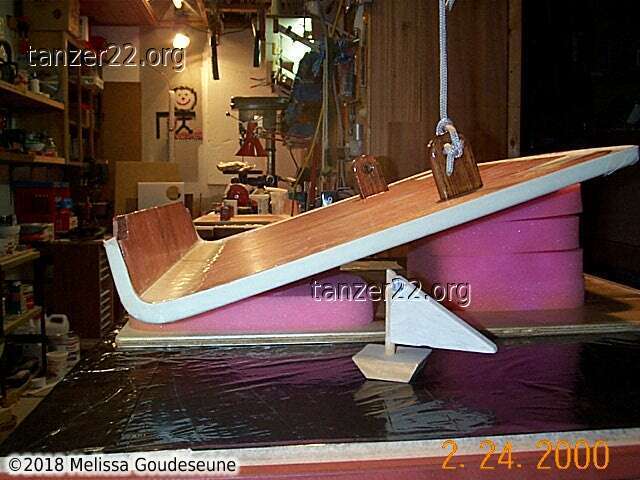
The curve in the lids was especially troublesome -- the previous inside
cover had a sheet of bent gelcoat, which I wasn't in a position to
duplicate. Instead, I propped the cover up at an angle, and filled the
space with thickened epoxy. Each cover used about 12 oz of epoxy thickened
with 12 oz of microbubbles. The meniscus on the top edge gave me a nice
round corner for the fiberglass.
With the "curve" done, I then proceeded to complete filling the edges and
the hinge cutouts:
Next was filling the edges of the face. I couldn't match the curve
immediately, so I put masking tape around the edge of the fiberglass and
core, and just filled it up flush. Later, I could round the corner with a
file.
And now it's starting to look like something! Fitting the fiberglass
cloth (woven roving) -- first photo. The second photo shows the cloth
drying with all kinds of clamps and weights on it. I purposely cut the
cloth too long for the front face, so it's hanging over the lip. In the
third photo, you can see that I've cut off the excess cloth in preparation
for sanding.
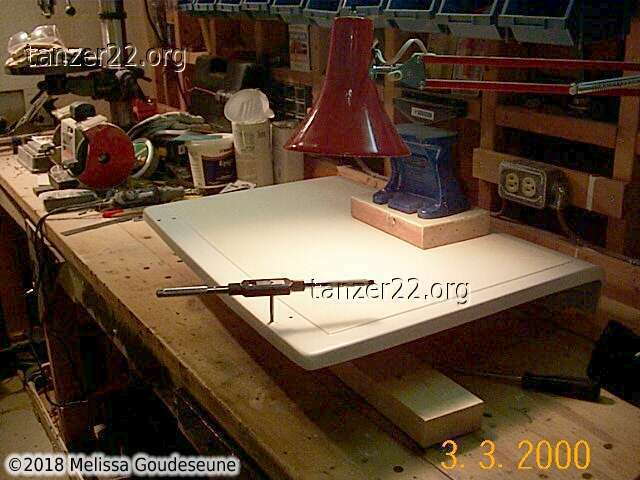
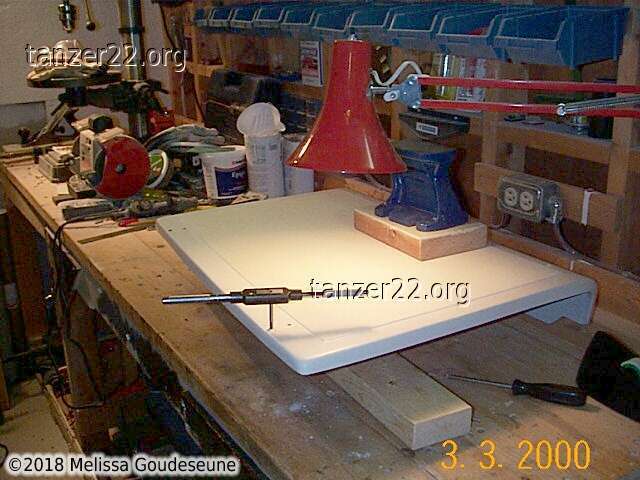
Just before painting the inside with light-grey tremclad oil paint:
To make the hinges stronger, I opted to tap the holes for the hinges,
rather than just drilling them and depending on the nut on the bottom. The
bolts are #10-32, and I drilled the holes at 5/32".
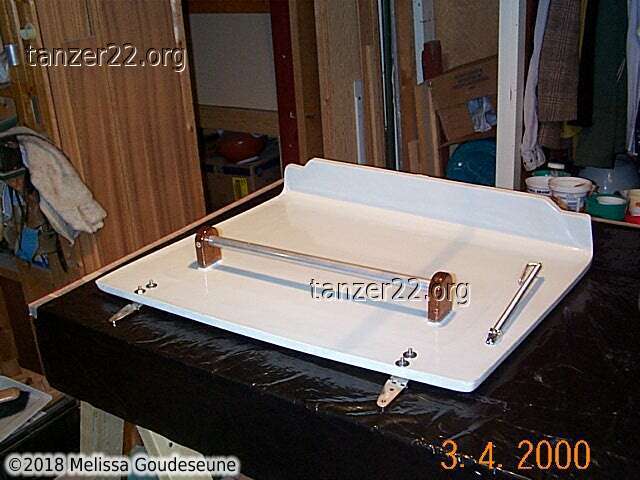
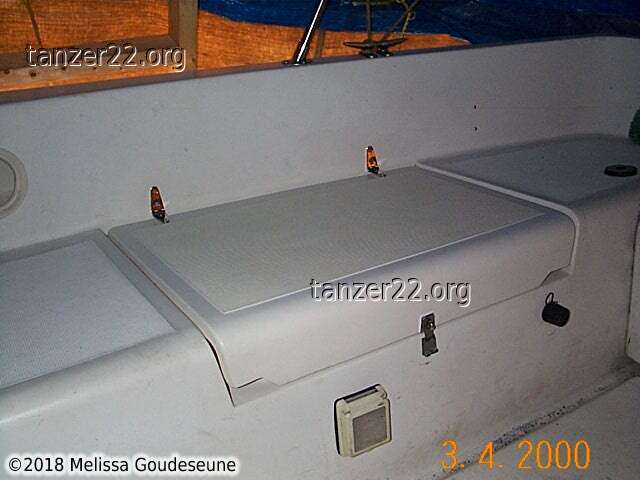
And now they're finally done! This is with all the hardware installed,
including the hatch springs, which were screwed into the captive nuts (see
above).
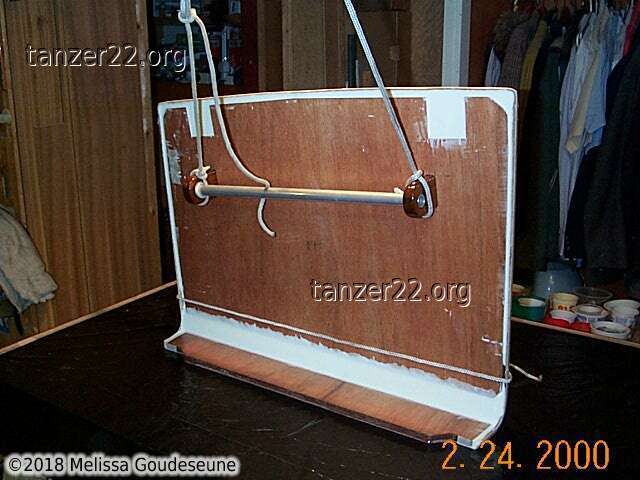
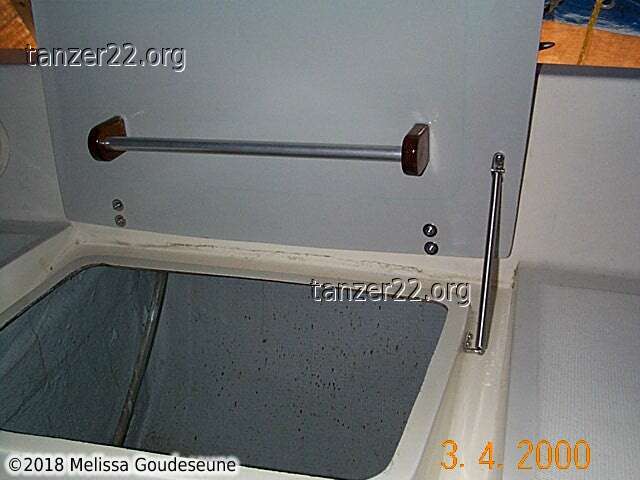
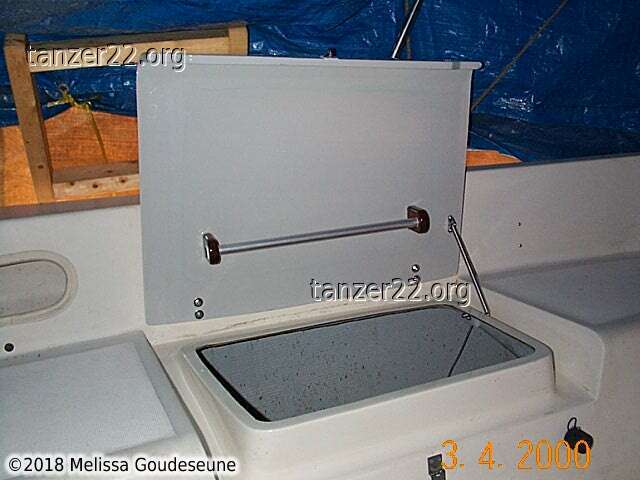
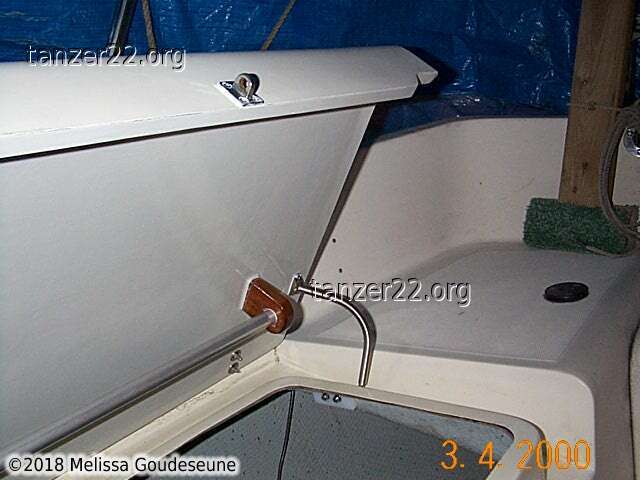
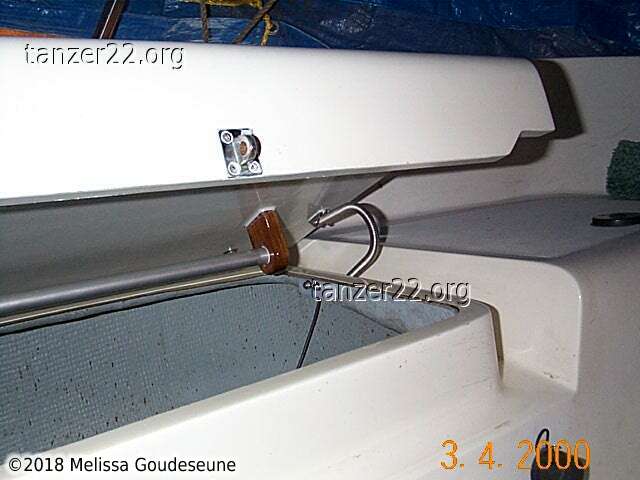
This is a good photo of the hatch spring, as installed on the boat. When
the lid is fully open, the spring is straight, and cannot be closed. The
aluminum bar is for hanging lines inside the locker to dry, and also
precludes the need to reach way inside the locker to grab a line, as
they automatically come up with the lid!
How the hatch spring works: when you deflect the spring just a little bit,
it then allows the lid to close. Because the edge of the opening isn't
perfectly vertical, the spring tends to rub on the opening, which will
necessitate a bit of spinnaker tape to take the wear. Not a big deal.
Also, I haven't yet installed the gasket, as my lids are now much thicker
than they used to be, hence I need a thinner gasket. The gasket will be
mounted on the lid instead of the boat, so they won't sustain all the abuse
that the gaskets normally have to put up with!
It's good to have this project done!!!
© 2018 Melissa Goudeseune