The topping lift supports the boom when the sail is not in
use. Some people like to disconnect the topping lift while under sail,
but they have to remember to reattach it prior to lowering sail.
Because I prefer to leave it attached at all times, Brave and Crazy's
topping lift has gone through several versions.
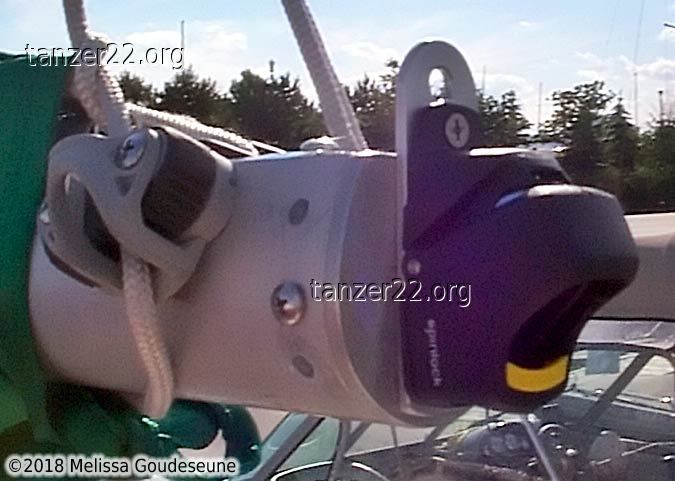
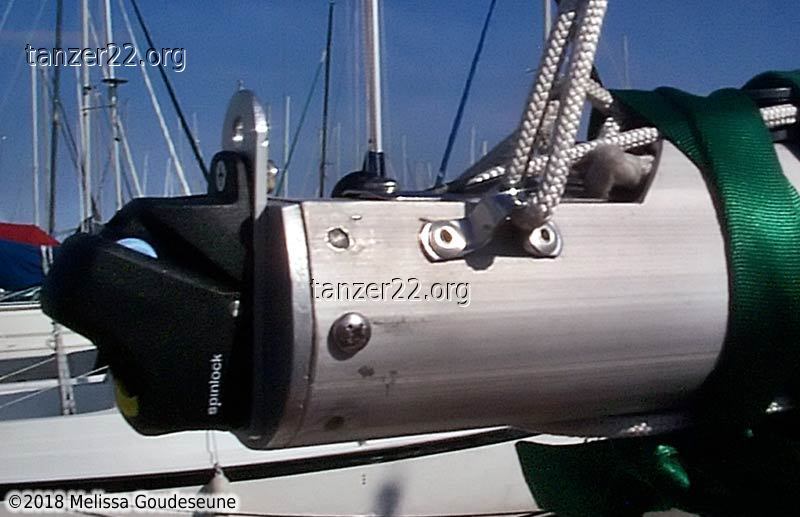
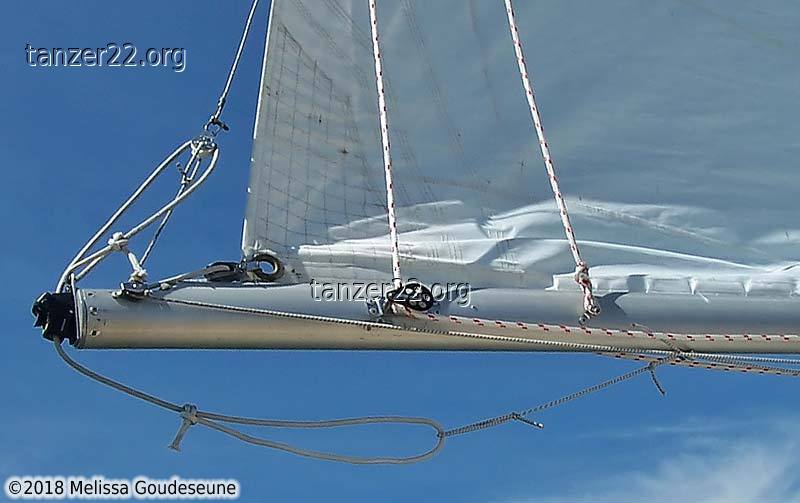
I started with a Ronstan cam cleat mounted on the side of the boom.
The two photos above also show the Spinlock PX Powercleat I installed
to replace the cam cleat. The Powercleat is mounted on the end cap
of the boom, with an aluminum plate underneath it to dead-end the
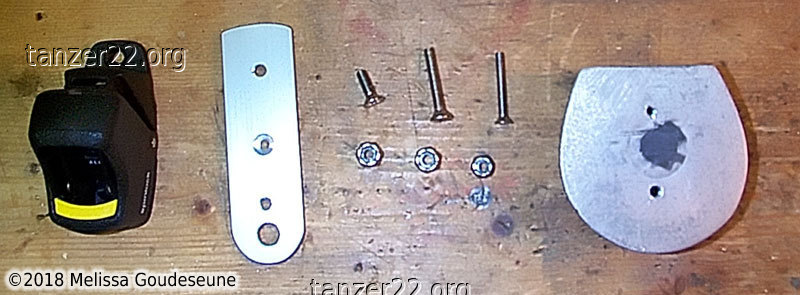
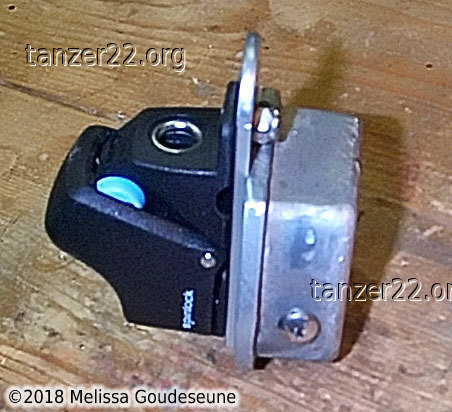
topping lift and easily provide a 2:1 purchase. A few photos of the
parts, and the assembly:
The Powercleat was a great improvement, but the stainless-steel wire
topping lift was still chafing the leech of the mainsail.
To avoid chafing, I added a bungee cord with a cheek
block to tension to the topping lift when the sail was in
use. This helped, but not enough.
Four years later, I replaced all this with an Amsteel (aka Spectra) topping
lift. Of course, I had to splice the ends
of the Amsteel, as it's way too slippery to tie a knot in. The
recommended splice is the Mobius Brummel, as described by Brion Toss in
The Complete Rigger's
Apprentice. I chose Amsteel for several reasons: it weighs about
7 times less than steel with the same tensile strength, the light weight
allows the wind to blow it away from the sail, and the single braid
is straightforward to splice.
In a Brummel Splice, the standing part and the tail
each pass through each other, locking the splice together. With
a topping lift or a halyard, there can be a lot of rope to pull
through, which makes the Mobius Brummel described here the preferred splice.
Through some topological magic, the splice appears from only one end of
the rope.
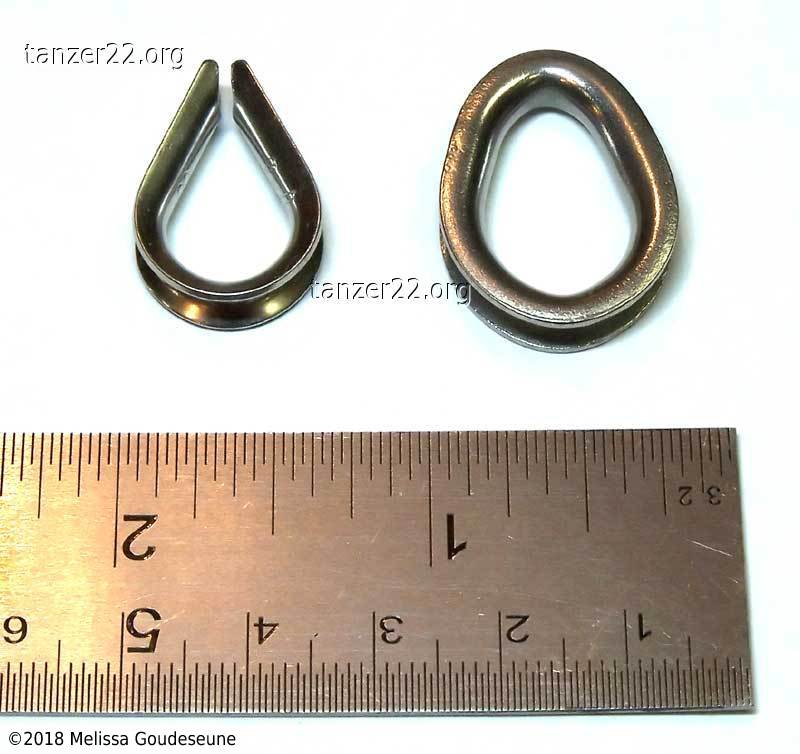
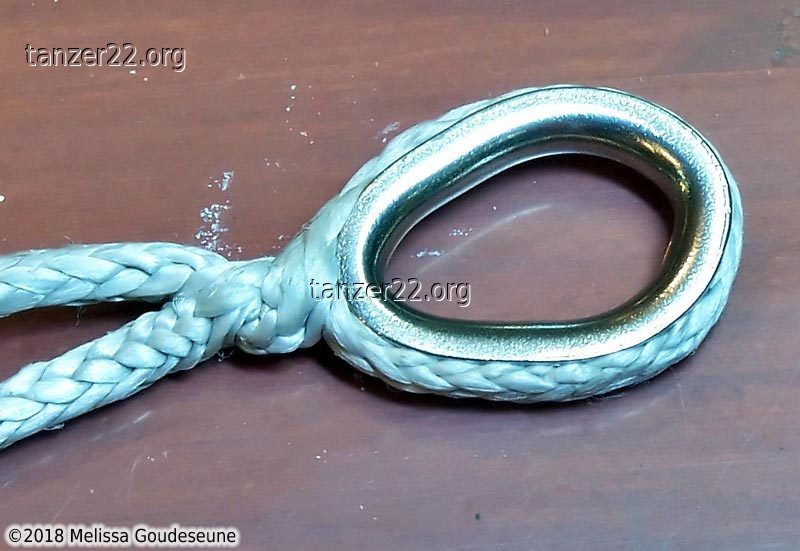
First, a comparison of thimbles. The formed thimble on the left of
these two photos only costs $1.00 or so. The welded thimble on the
right costs $5, is much stronger, and has a much deeper groove to
protect the rope in the eye. I opted for the expensive ones.
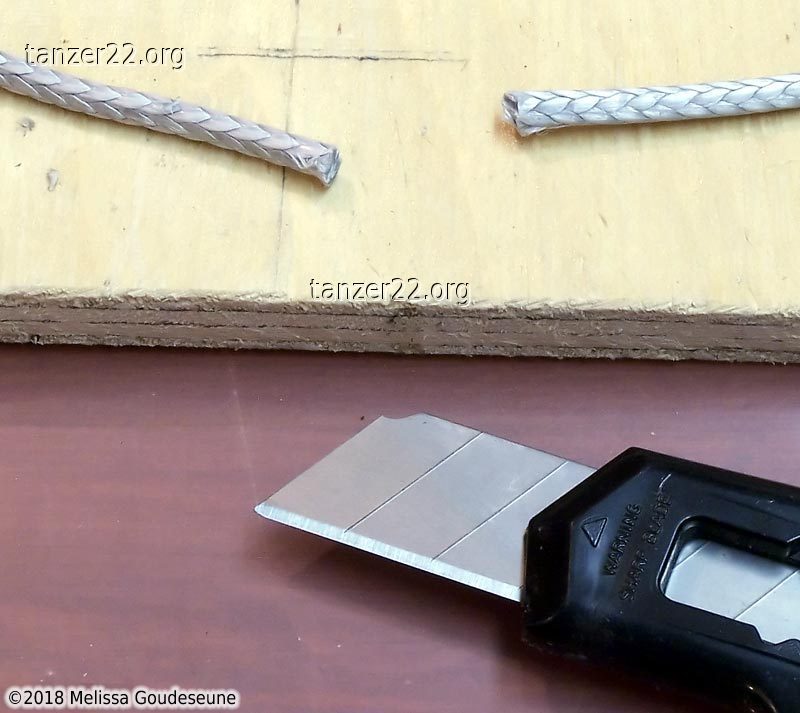
Amsteel is very difficult to cut with scissors. I used a sharp knife
against a piece of scrap wood as a cutting board.
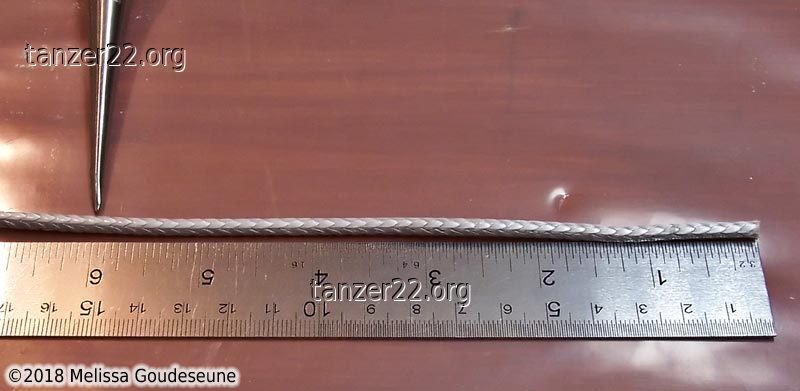
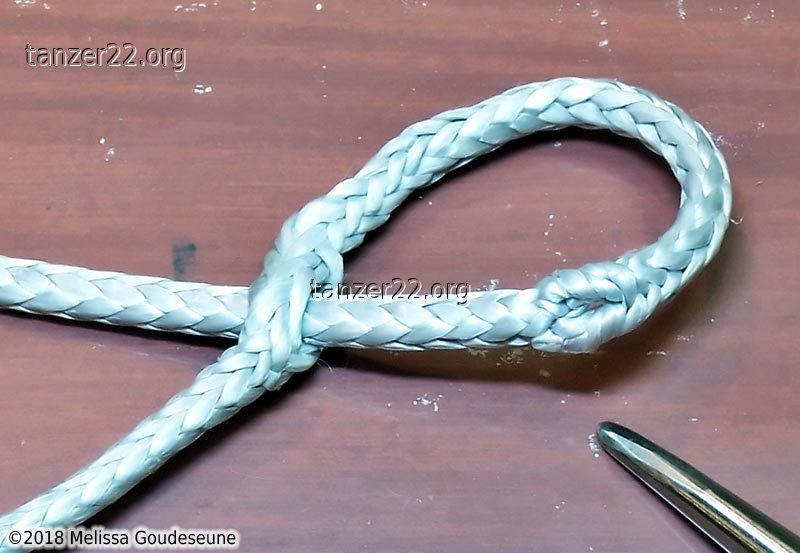
I started the splice by marking the position of the first eye. The
dimension is 48 rope diameters from the end (for 7/64" rope, that works
out to 6" -- well, actually, 5", but 1" longer is good).
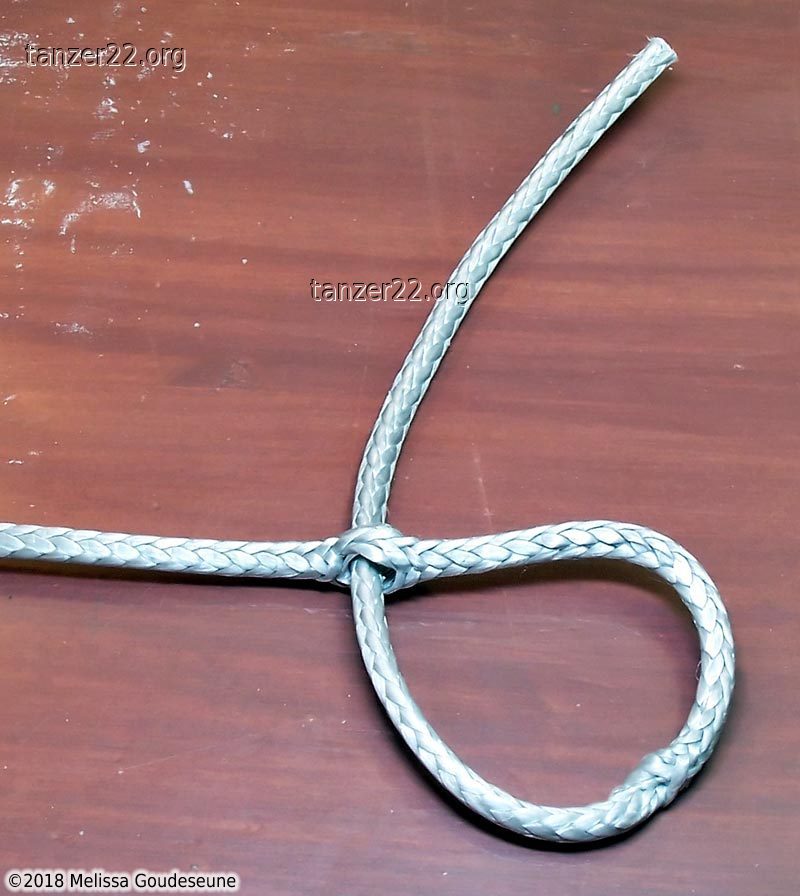
I used a Japanese Awl to form an eye at the 6" mark. Photo 2 shows the
same eye, upside-down.
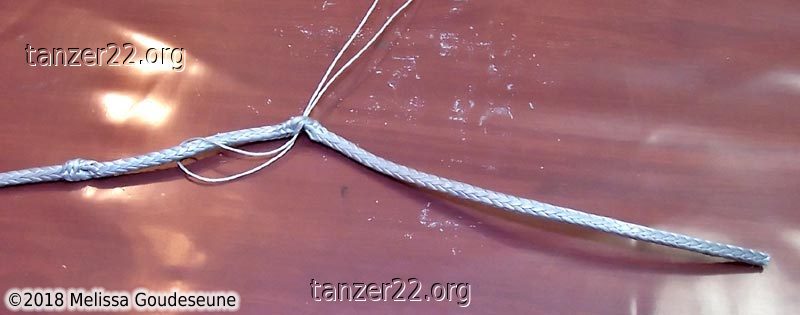
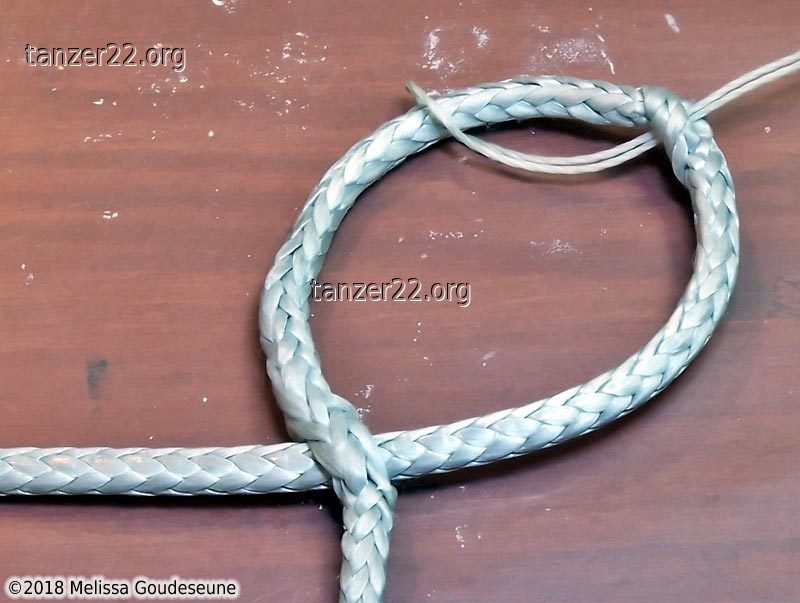
I inserted the tail of the rope into the eye (photo 1) and pulled it
through (photo 2) until it began to capsize (photo 3). This is slightly
unnerving, as most ropework advises against distorting the braid this much.
The capsized eye can be thought of as "inside out".
The capsized eye, view from above (photo 1) and below (photo 2).
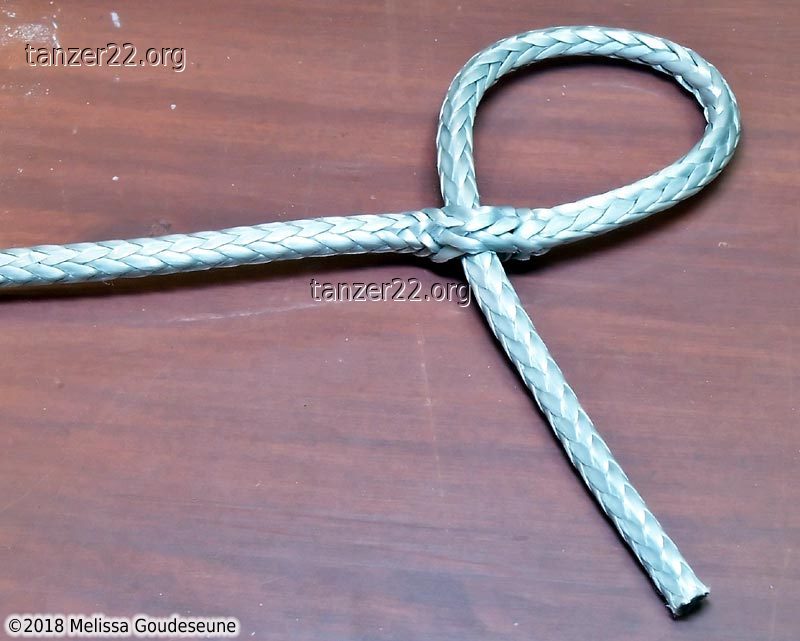
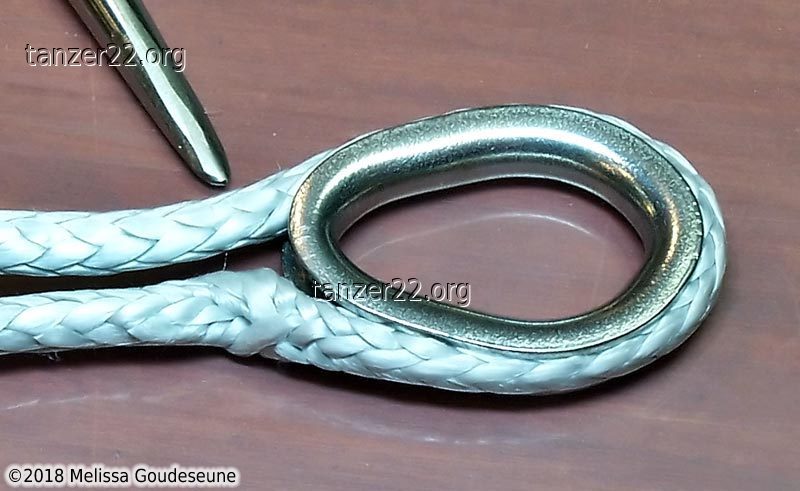
Next I wrapped the rope around the thimble and marked the position of the
second eye. In this photo, the standing part is at the top, and the
tail is at the bottom.
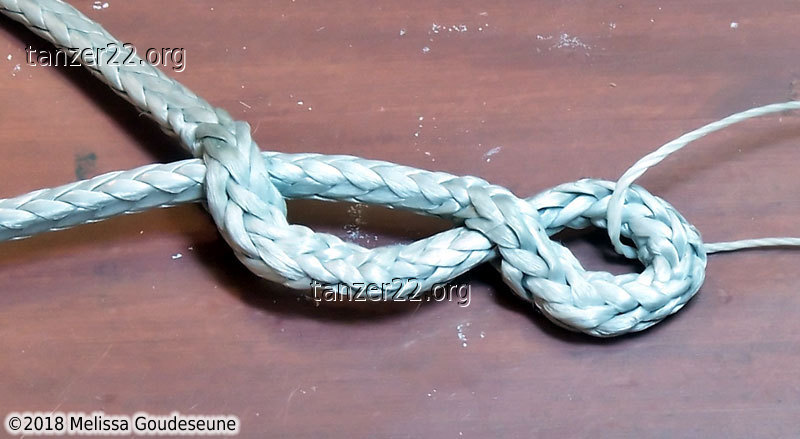
With the awl, I formed another eye (photo 1). I tucked the tail through
(2) until the eye capsized (3, 4).
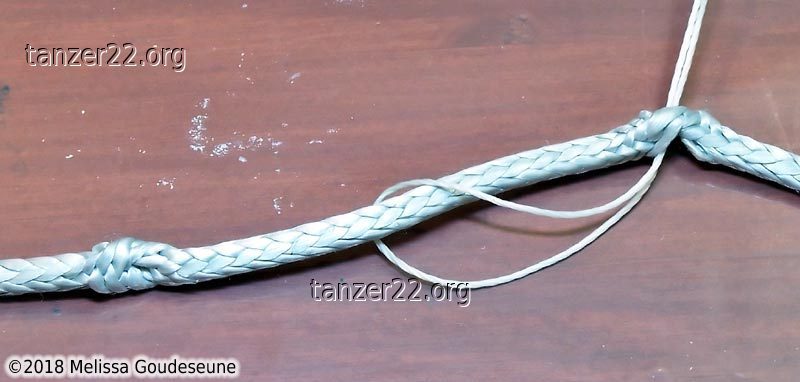
Using a length of whipping twine, I pulled the middle section between the
eyes is through the first eye. I did it wrong the first time, and the eye
did not want to capsize back to its normal form.
The problem was the direction I had threaded the twine. With the loop
of twine pointing the other way through the capsized eye, I was able
to pull, massage and pry the middle part through the capsized eye.
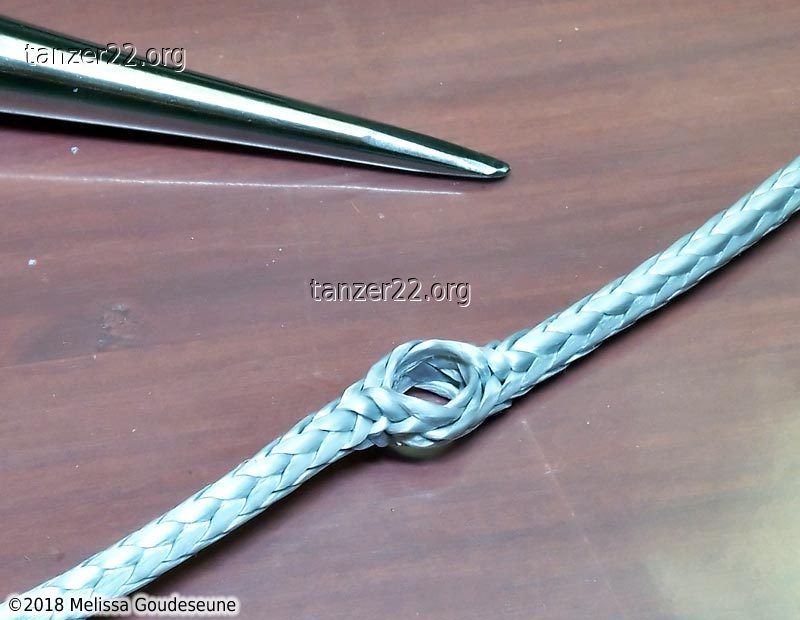
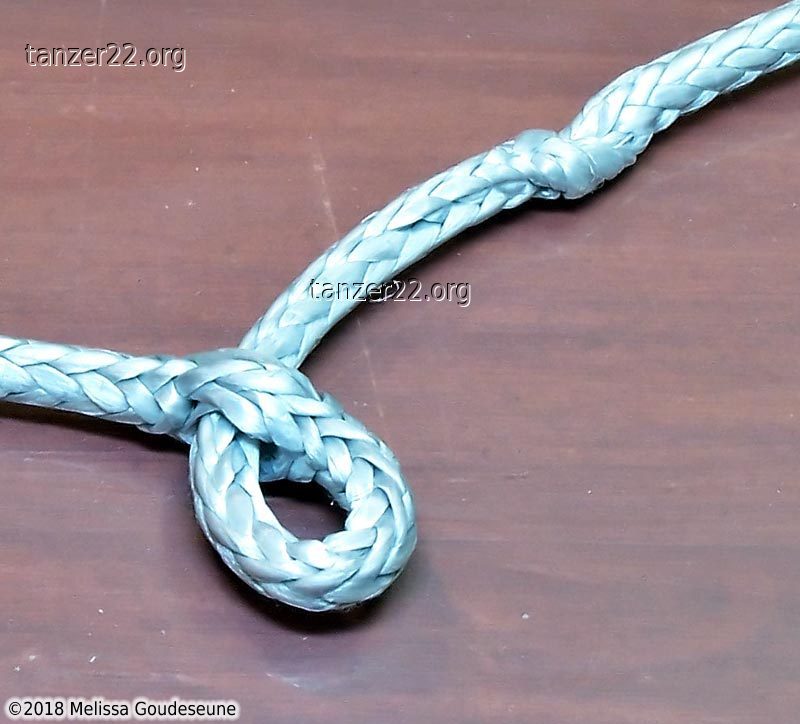
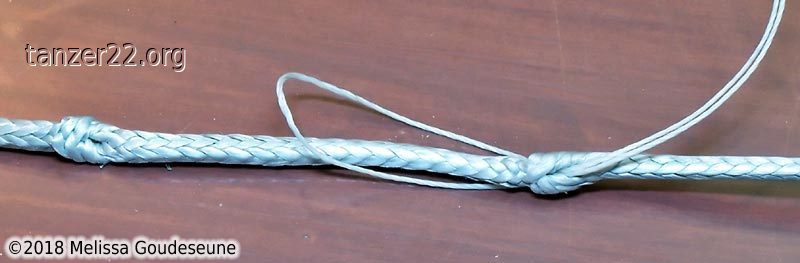
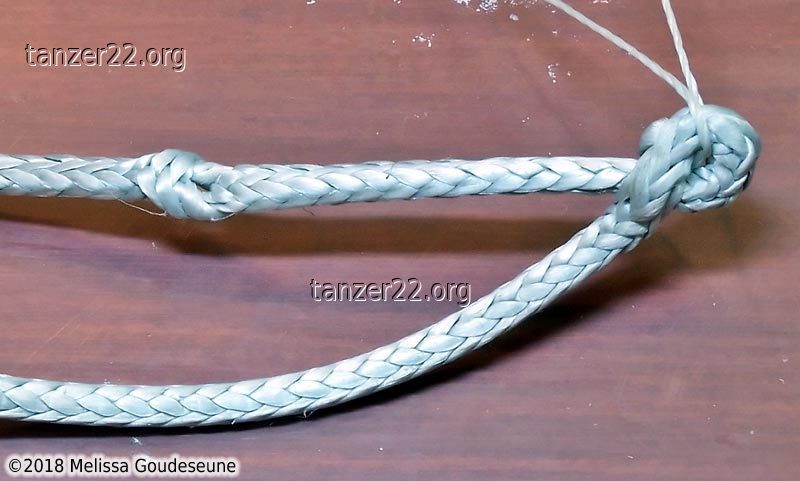
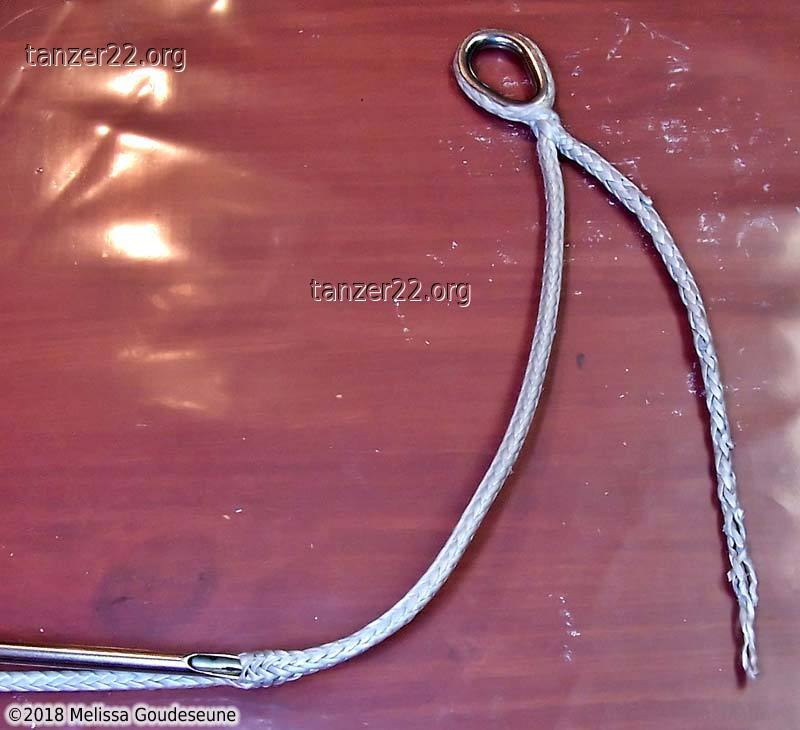
Once the first eye had capsized back, I pulled the standing part
through so that the second eye came through as well. In photo 3, the
awl is pointing at the second eye.
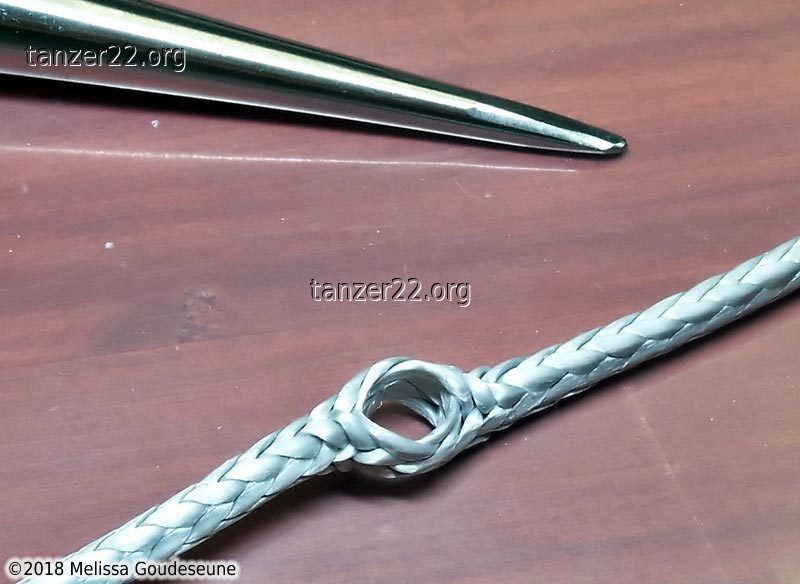
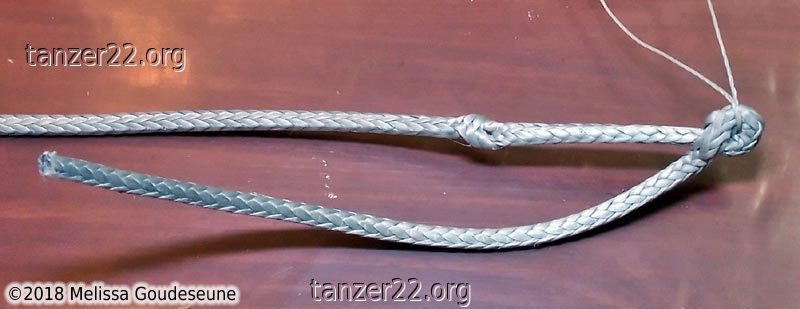
I used the loop of twine again, to make the second eye capsize back.
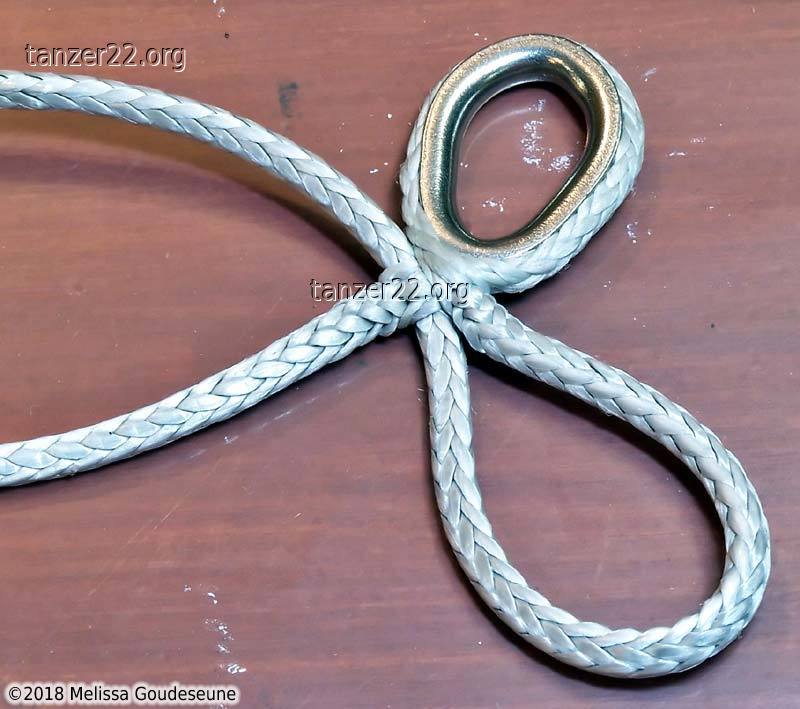
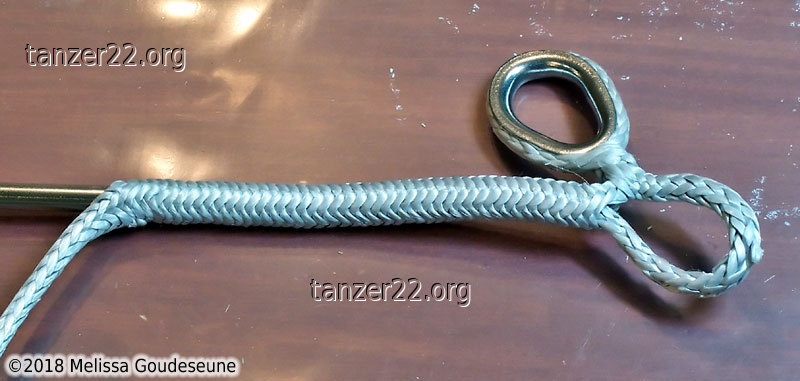
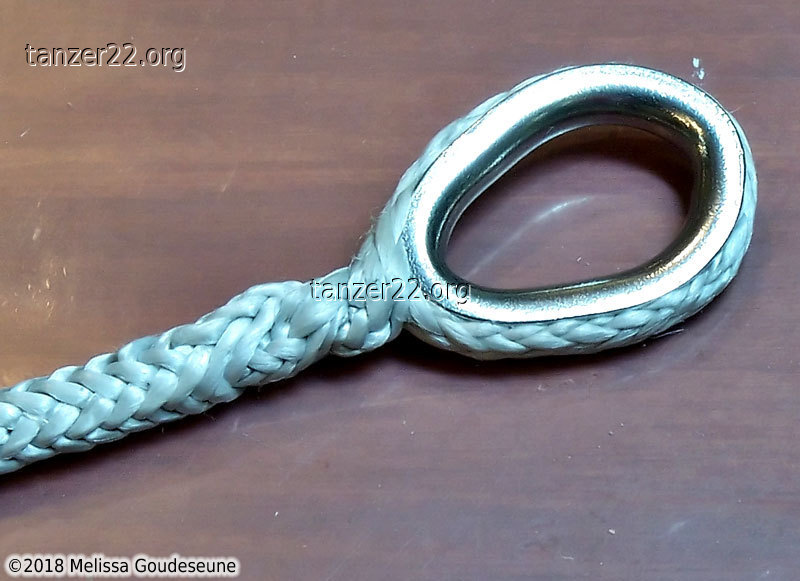
Once the second eye capsized back, the symmetrical form of the splice was
revealed. Photo 2 shows the splice functionally complete.
On this particular Mobius Brummel, I made the splice very tight
around the thimble to prevent play and chafe. To insert the thimble, I
had to back off the splice a bit to give some working room. This is not
normally necessary. Photo 2 shows the thimble inserted and the splice
snugged up against the thimble.
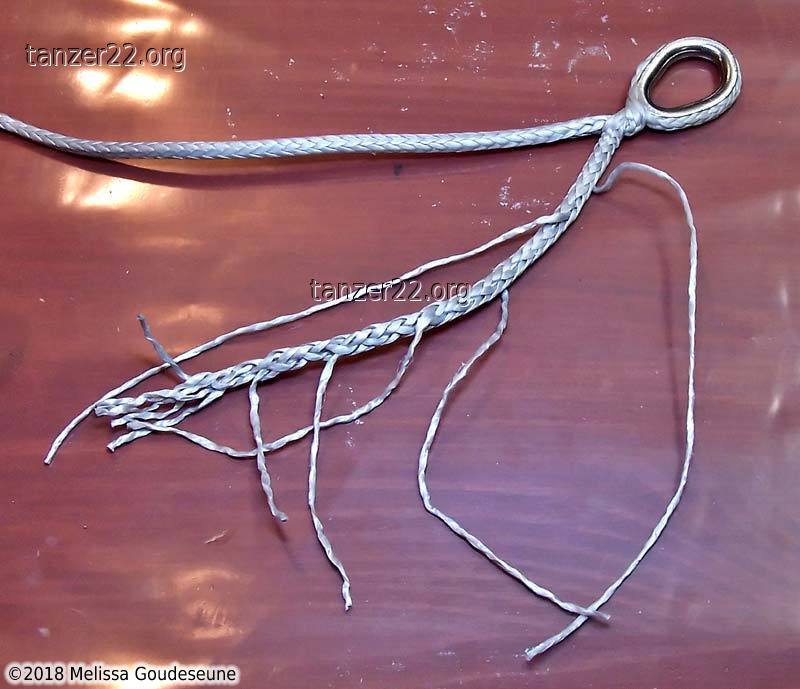
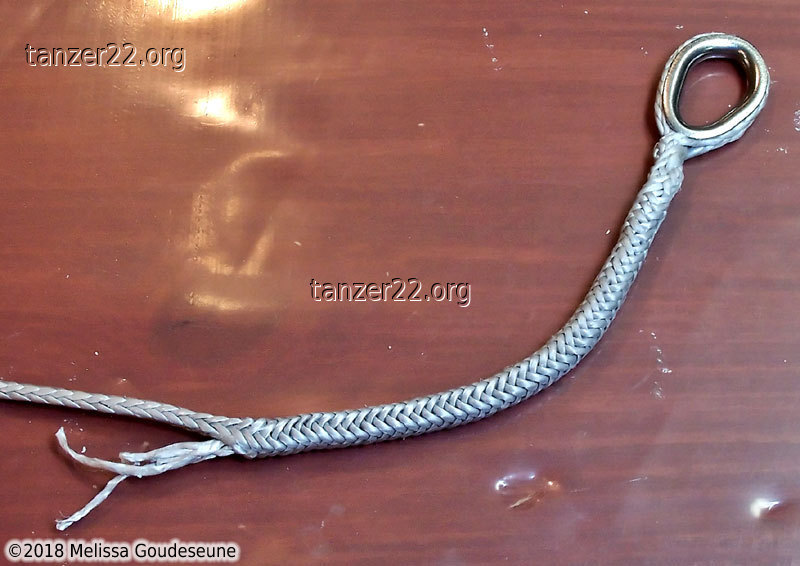
For a smooth transition into the splice, I tapered the tail.
I used an awl to pry out individual yarns (which were then cut off). I
also cut the very tip of the tail at a long taper.
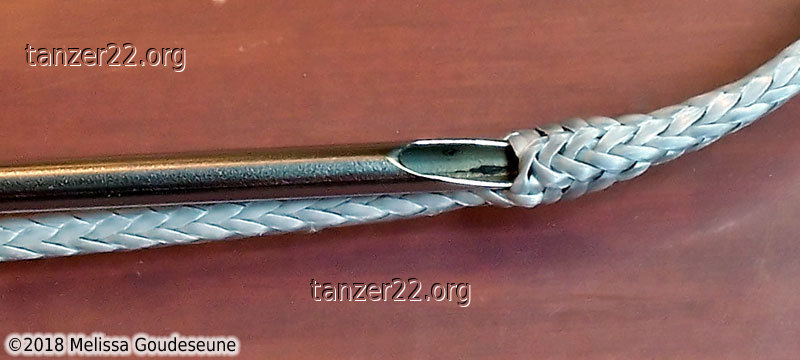
The
Brion Toss Splicing
Wand makes the final tuck fairly trivial. I inserted
the wand into the standing part, a bit farther than the length
of the tail. It is usually necessary to massage the rope around the
wand. Brute force does NOT work here.
The wand exited the standing part right next to the splice. The snare was
then extended and used to snare the end of the tail.
I now carefully pulled the wand through the standing part, until the
tail came out the far end (photo 2).
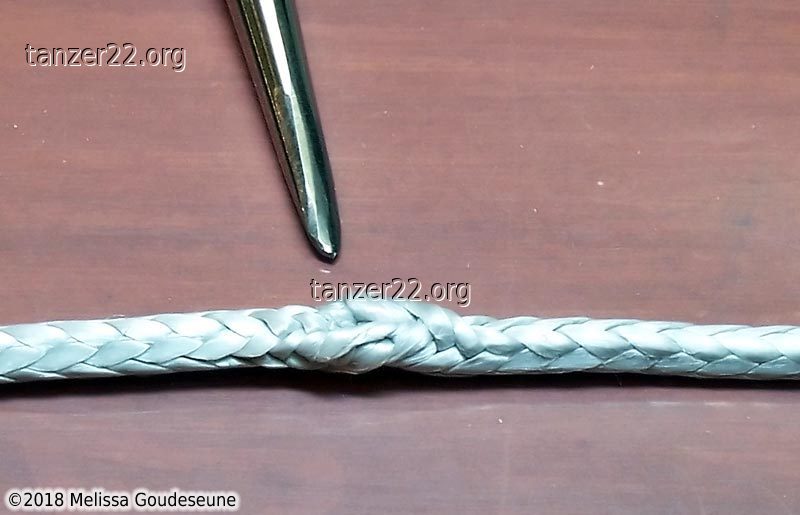
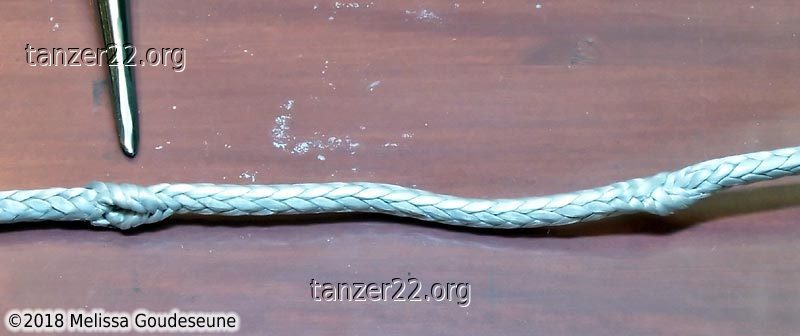
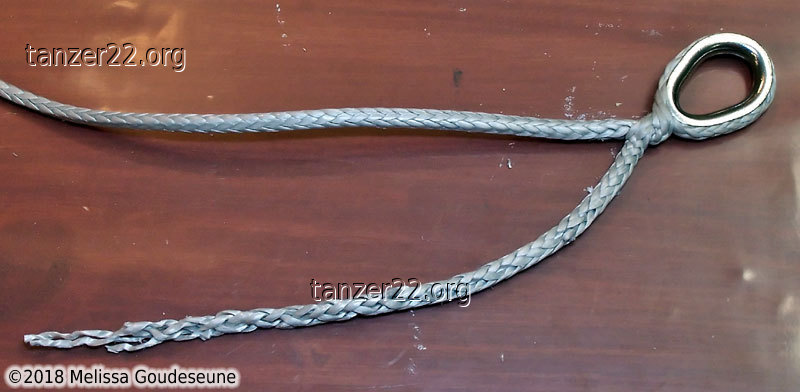
Finally, the splice is smoothed out by hand, and the tail should now
disappear inside the standing part. Photo 2 shows the completed Mobius
Brummel.
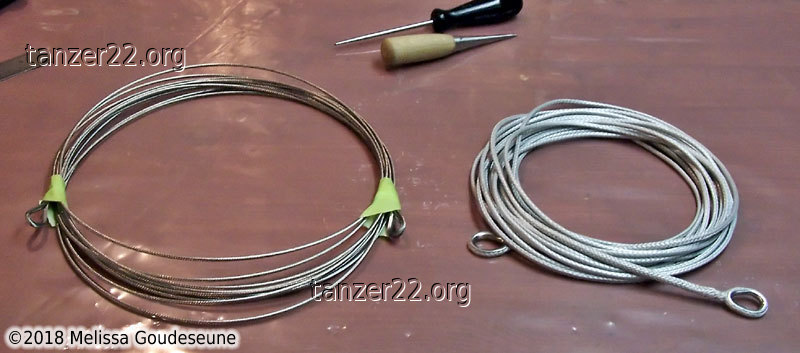
For comparison, I weighed the old and new topping lifts. The stainless
one (on the left) was a bit over 200 g. The Amsteel one was about
60 g. The topping lift by itself wasn't 7 times lighter, but when you
add the other hardware that went away...
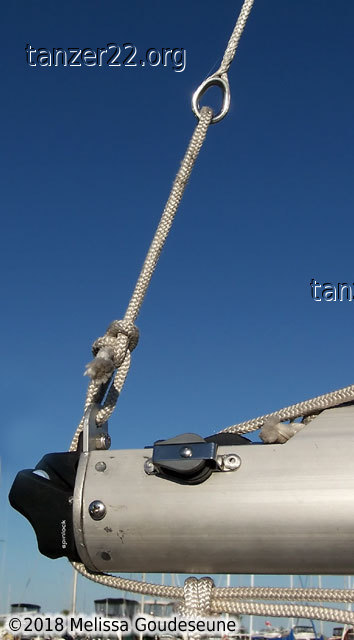
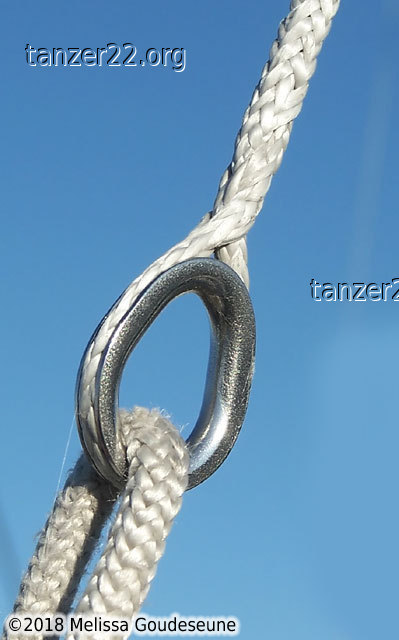
Finishing off, three photos of the new topping lift installed. Due to
the better-quality thimble and light weight of the new topping lift, I
was able to remove the block & shackle at the thimble, as well as the
bungee cord previously used to tension the topping lift. Underway, the
Amsteel topping lift flies completely clear of the leech of the mainsail.
Mission accomplished!
© 2018 Melissa Goudeseune