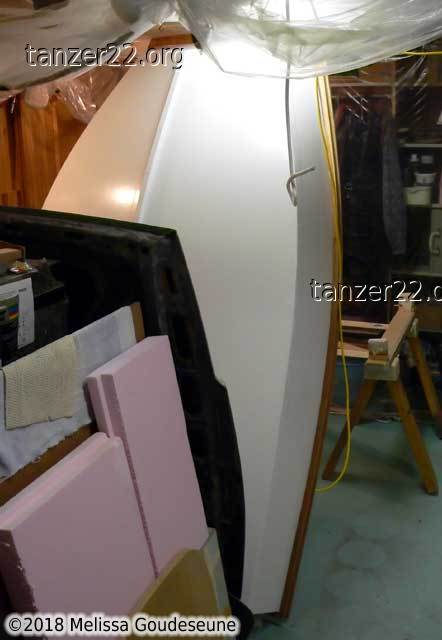
Aft Seat
The seats are one area of the boat where I took some creative liberties
with the aim of reducing weight.
As designed, the aft seat is to be made of 1" x 10" mahogany, almost 3 feet
long. Most builders also add foam flotation to the dinghy, as there is no
flotation in the dinghy.
I figured that if I was going to add foam, I might as well make the seats
out of foam. Then it would provide flotation as well as strength to the
boat.
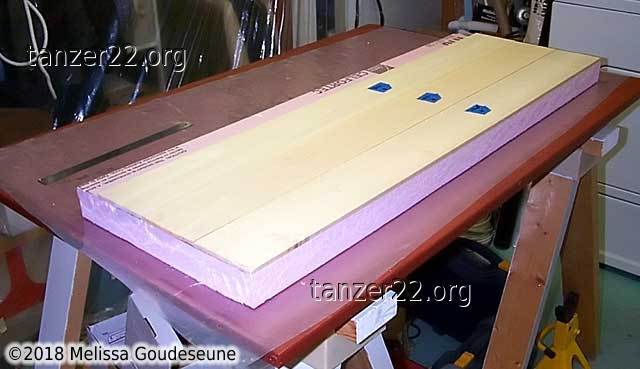
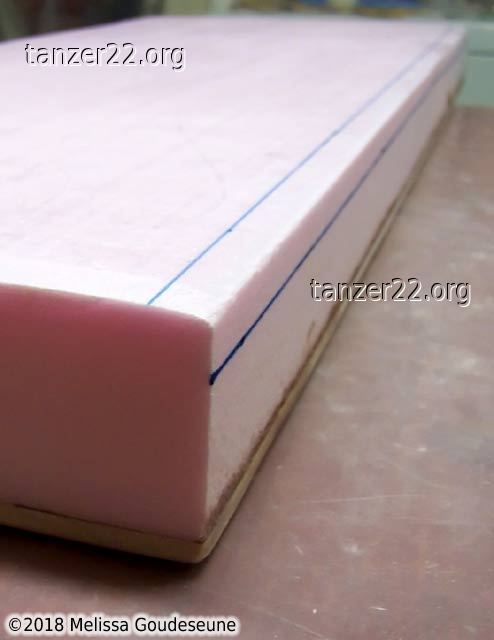
The foam I used was 2" pink polystyrene foam from Home Depot. This
particular foam is rated to a pressure of 30 psi. This is important mainly
in terms of durability. Brand names to look for are "Celfort 300" or
"Foamular 300".
Foam and Balsa
I started off by cutting the foam to roughly the size I needed. I built
the aft seat slightly wider than designed. The upper surface is three
pieces of model aircraft balsa, 1/4" x 4" x 4' long. So the seat is 12"
wide, versus 9-1/2" in the plans.
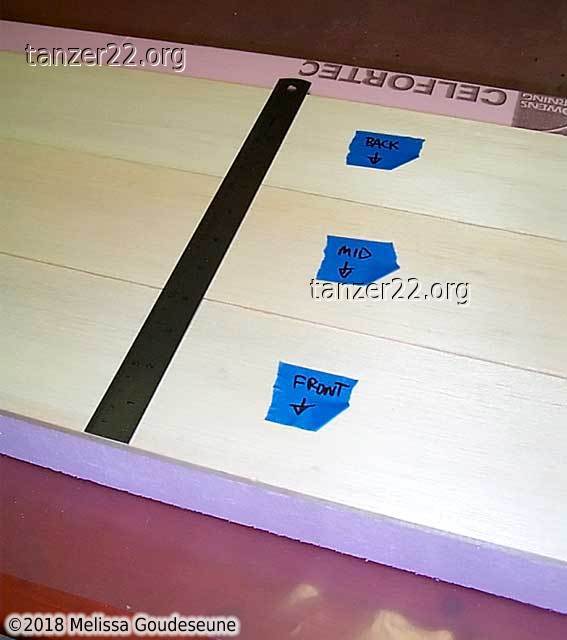
The balsa is then test fitted on the foam. Labels are used to mark the
various parts, saving confusion once the parts are wet with epoxy.
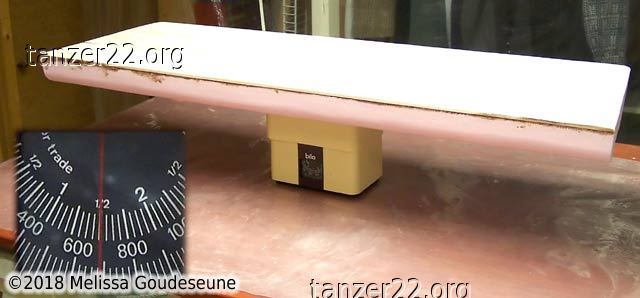
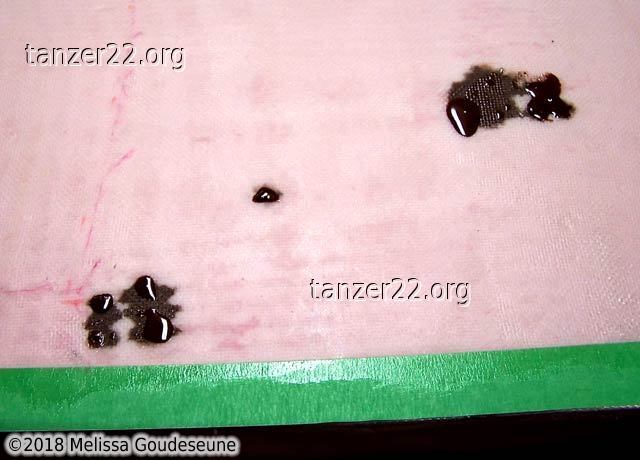
I did a test layup on a piece of scrap foam, to decide how many layers of
fiberglass would be needed on the seats. In one layup, I applied one, two,
and three layers of 6oz fiberglass cloth to the pink foam, and compressed
it using vacuum bagging techniques. The number of layers corresponds to the
numbers visible in the photo.
The result was that one layer could be easily dented with a finger, two
layers was more durable (but could be damaged by extreme force), and three
layers was bombproof.
As a compromise between strength, amount of cloth, and difficulty of layup,
I decided to apply two layers of cloth to the seats.
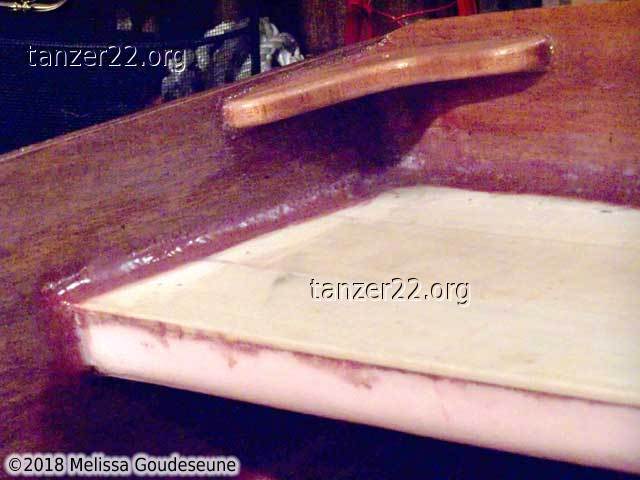
The sides of the seat were cut to a complicated 3D bevel to match the
shape of the hull. The aft seat also attaches to the stern transom,
which it does not in the plans.
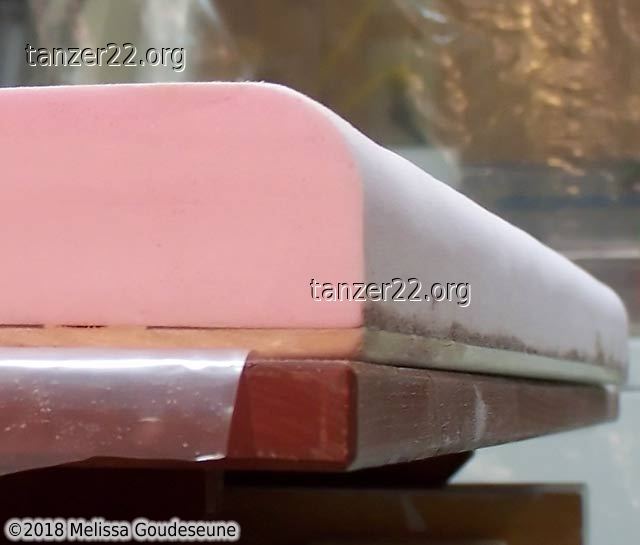
The front lower edge of the foam was rounded prior to applying the
fiberglass cloth. This gives a nice radius for the cloth, as well as
making the seat appear to be thinner than it actually is.
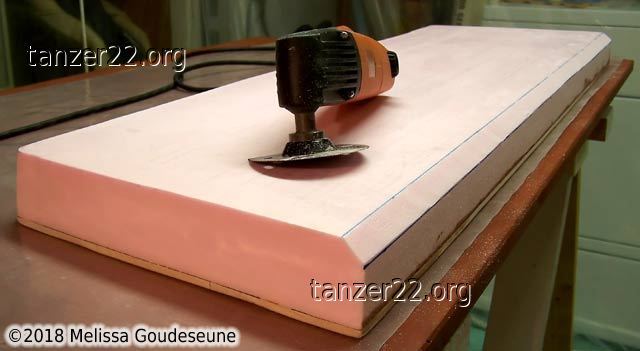
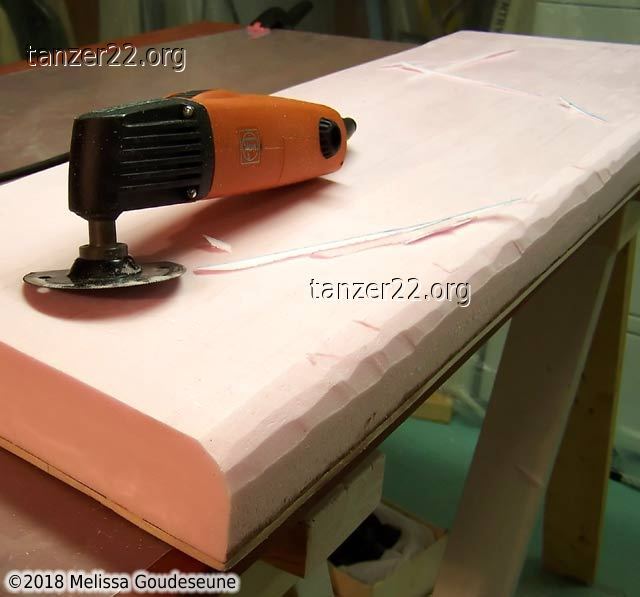
I marked cutting lines at 1/2" away from the corner, and cut the 45 degree
bevel using the Fein Multimaster. Next, a double bevel was cut to bring
the shape closer to a radius.
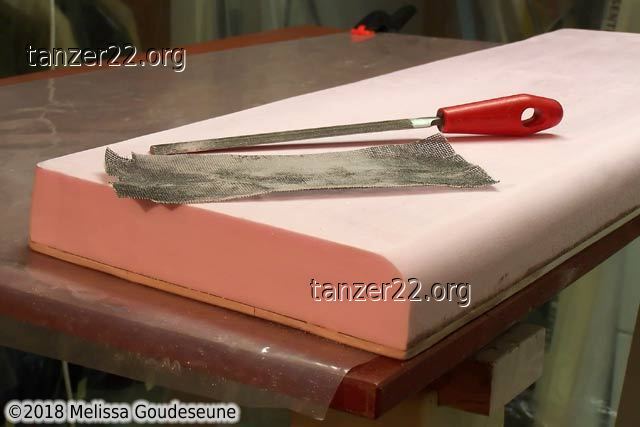
Final shaping was done using a wood file and a sheet of drywall screening.
It is very important to use VERY little pressure when sanding foam, to
prevent tear-out of chunks of foam.
Weight of the foam + balsa seat: 700 grams.
Fiberglassing
I used a two-step process to apply fiberglass to the seat. First, the
fiberglass was tacked in place using 3M 77 spray adhesive.
Once both layers of fiberglass were in place, I could apply epoxy without
worrying about both layers sliding around.
If you're shopping for 3M 77 adhesive, do note that there are two formulations.
One uses cyclohexane, which is OK for foam. The new type uses acetone,
which will dissolve polystyrene foam (e.g. the pink foam I'm using here).
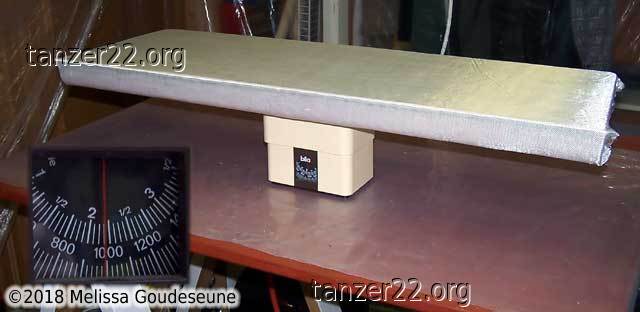
On the aft seat, I used two large pieces of fiberglass which wrapped around
the front edge of the seat. I masked off the fiberglass with newspaper,
sprayed adhesive on the seat, and then carefully rolled the fiberglass into
position.
Weight of the aft seat, with fiberglass: 1000 grams.
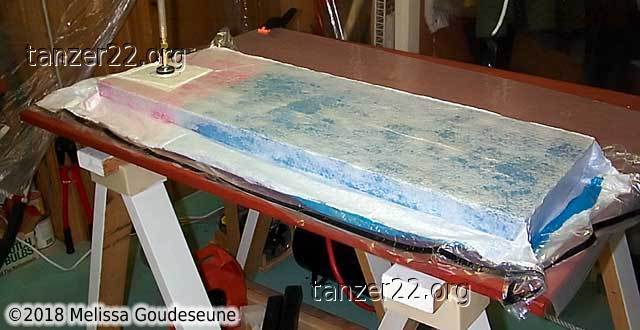
Vacuum Bagging
Due to the time constraint of working with 12 fl oz of epoxy and closing
up the vacuum bag, I don't have any photos of the process itself. In their
absence, here are the steps I followed:
- lay out the vacuum bag and bagging materials:
- vacuum bag
- felt breather fabric
- nylon release fabric (blue and pink in these photos)
- place the seat on the nylon release fabric
- coat one side of the seat with epoxy to wet out the fiberglass
- turn the seat upside down
- coat the other side of the seat with epoxy
- place the top layer of nylon release fabric
- place the top layer of felt breather fabric
- fold the vacuum bag closed
- seal the edges of the vacuum bag
- attach the vacuum hose, and turn on the pump
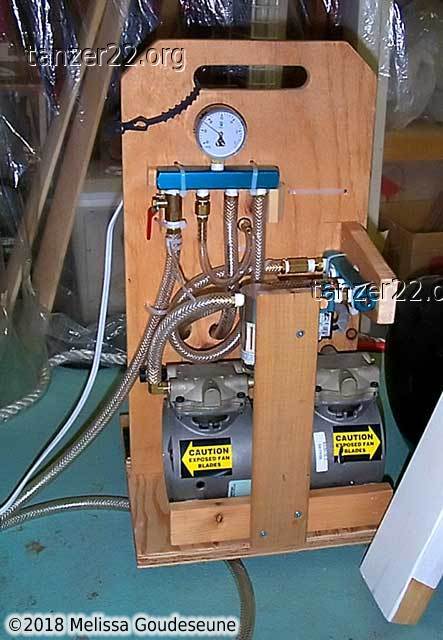
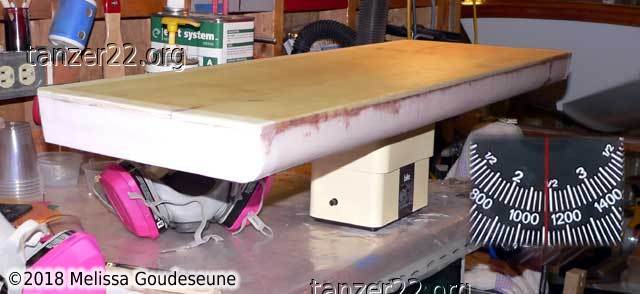
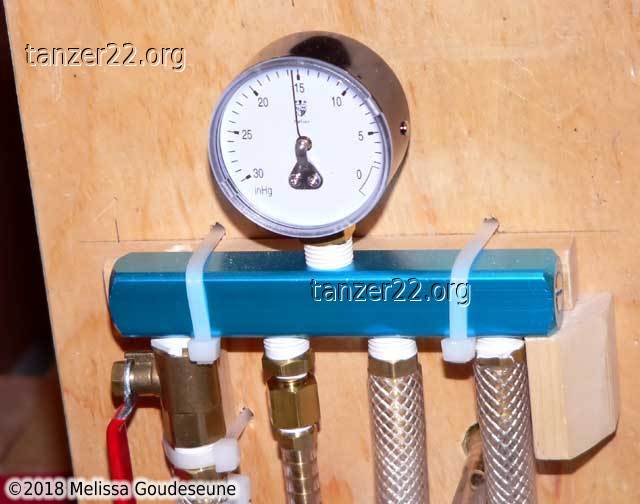
Photo 3 shows my recently constructed vacuum pump system. I was
pulling 22" Hg of vacuum on the aft seat. That doesn't sound like much,
out of context. Here's what it really amounts to:
- 22" Hg (22 inches of mercury) equals 11 psi (pounds per square inch)
- my aft seat is 12" wide by 38" long
- 12" x 38" x 11 psi = 5016 lbs
So in essence, I parked a large truck on my aft seat to press the
fiberglass against the foam.
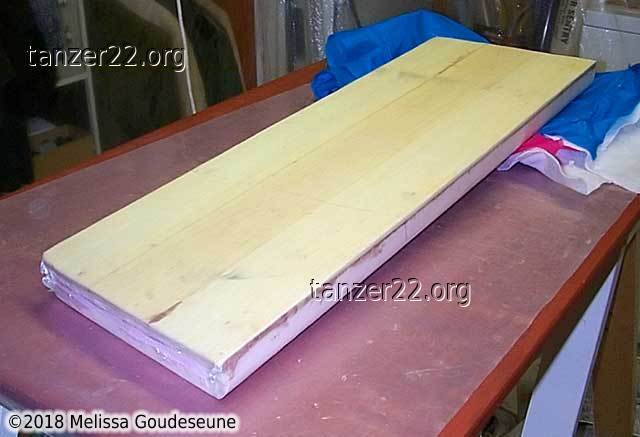
This is the seat just after I removed the bagging materials.
At this point, I applied a fill coat of S1 Sealer to the aft seat. It's
a very thin epoxy, functionally equivalent to CPES which is available in
the USA.
It is also at this point that I should have read the MSDS (Material Safety
Data Sheet) for S1 Sealer. The ingredient that makes it so thin is xylene.
To my dismay, xylene is also very good at dissolving polystyrene foam!
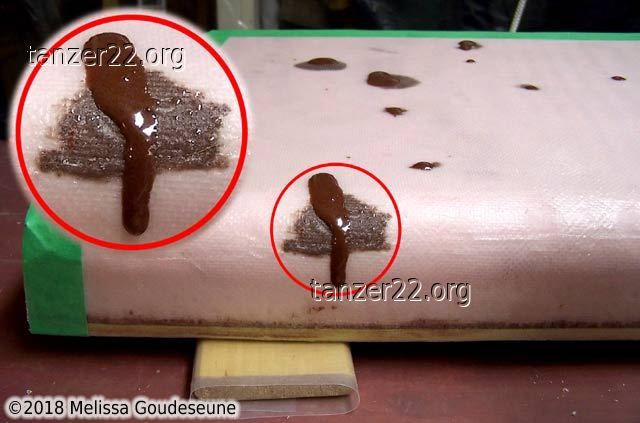
I ended up having to fill a number of voids using thickened epoxy using a
small syringe. In some locations, the epoxy was coming through the weave
of the fiberglass. The circled highlight in the first photo caused me
quite some angst while injecting the epoxy. The epoxy was thickened with
brown microballoons. However, a clear fluid oozed out of the fiberglass.
It had been many hours since the S1 incident, so it wasn't S1 Sealer.
I can only conclude that the fiberglass weave was filtering the
microballoons, and clear epoxy was coming through the weave.
As installed, with two layers of 6oz cloth, the aft seat weighs 1100 grams.
Fiberglass can be lightweight
To dispel the myth that fiberglass coating is heavy, here are the numbers
for the aft seat:
| area covered with fiberglass | 6.86 sq ft |
| weight of glass cloth (2 layers) | 300 g |
| weight of epoxy | 100 g |
| weight of one layer of glass cloth | 150 g |
| weight of epoxy for one layer of glass cloth | 50 g |
| weight of one layer of glass, with epoxy, per sq ft | 29.15 g |
So, vacuum-bagged, 6oz fiberglass cloth will add 1 oz per sq ft.
For those who still believe that removing excess epoxy with a squeegee is
as effective as vacuum bagging, I present these numbers:
| ounces of epoxy mixed to fiberglass the aft seat | 12 oz |
| ounces of epoxy actually in the fiberglass | 3.5 oz |
| ounces of epoxy absorbed by the breather fabric and discarded | 8.5 oz |
It is important to note that while there is a financial cost to the 8.5 oz
of discarded epoxy, there would be NO benefit to that epoxy still being on
the seat. The goal is to have the fiberglass as close to the surface as
possible, and an open cure will never be able to accomplish that as well as
vacuum bagging.
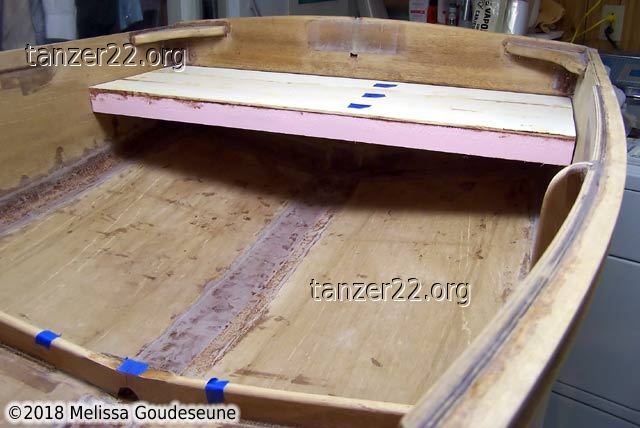
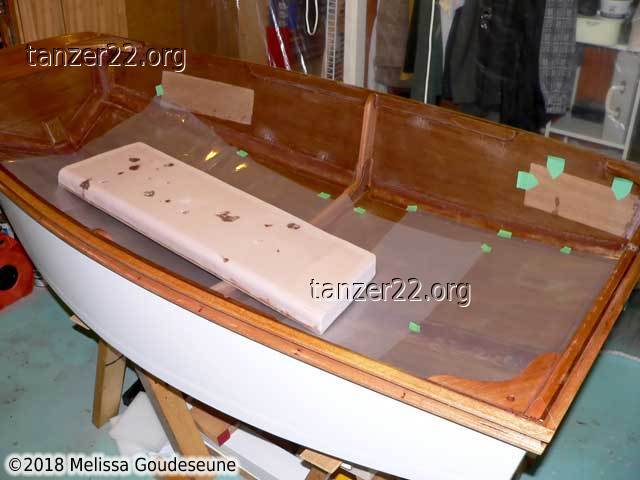
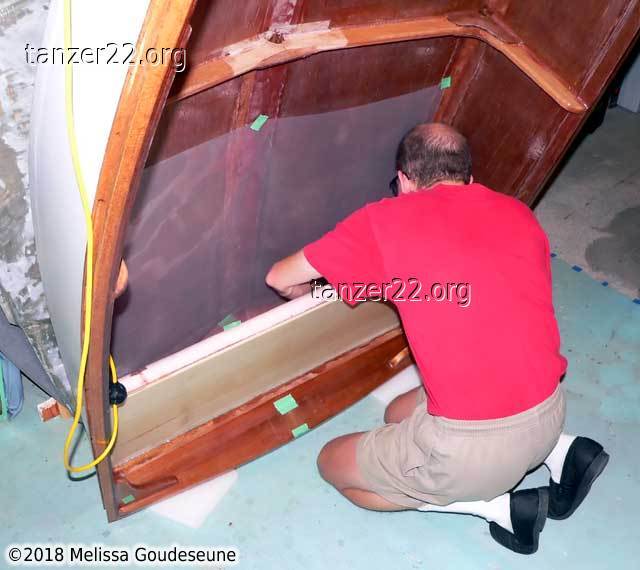
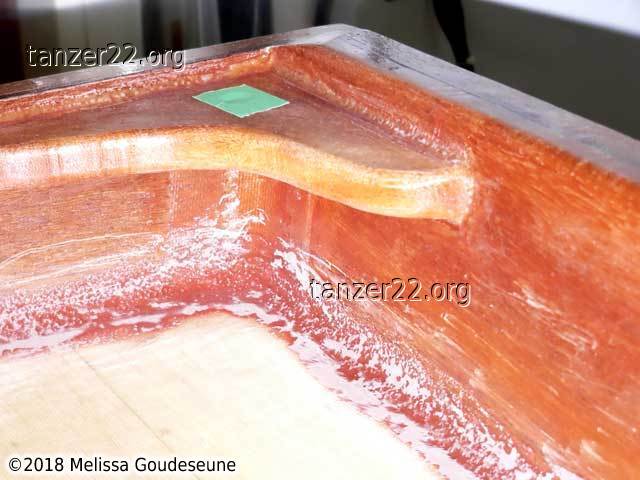
Aft Seat Installation
This is the aft seat just before installation. Polyethlyene sheeting has
been placed in the boat to catch the inevitable epoxy drips.
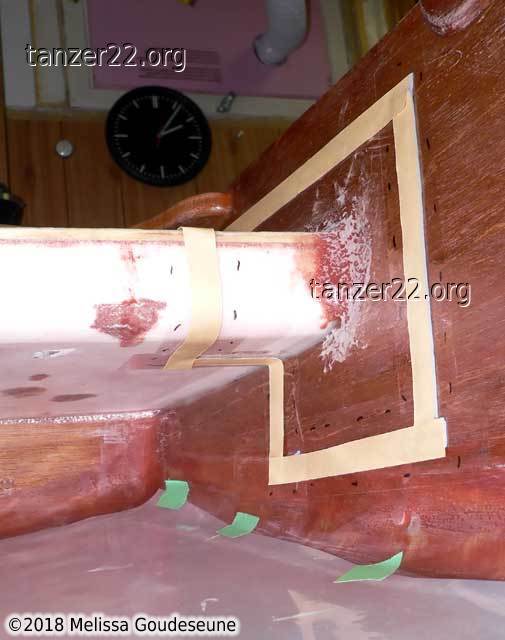
The green triangles of tape mark the position of the seat. A single pencil
line would give no information as to whether the seat was above or below its
target position, especially if the line was obscured. Now, when the
point of the triangle is at the surface of the seat, it's in the correct
position.
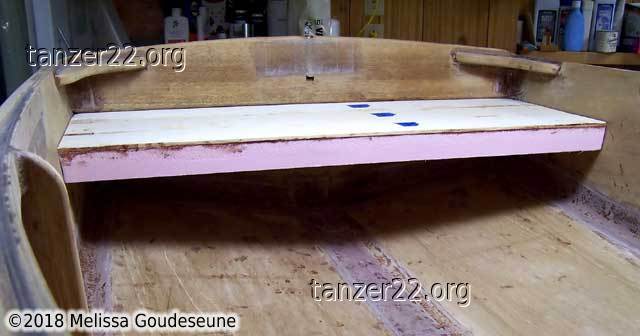
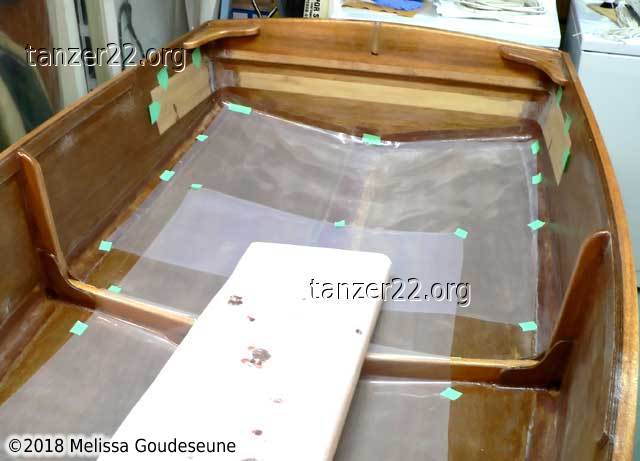
Also note that all the interior of the dinghy has been coated with epoxy,
with the exception of where the seats need to be attached. This ensures
that the bond between the seat and the dinghy will be as strong as
possible, as it will be a primary bond between wood and foam. Coating the
wood ahead of time would result in a secondary bond, which is not as
strong.
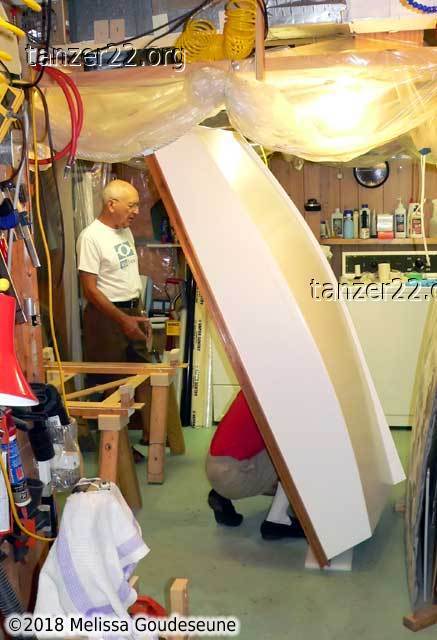
One of the advantages of a small boat is that it's possible to rotate the
boat as needed, so the epoxy is always flowing into the joint. We needed
to fill the gap at the back of the aft seat, where there was still a small
void. The easiest way to do this was to set the boat on end and inject
epoxy with a plastic syringe.
Photo 3 shows that this is indeed an amazing dinghy -- it has
standing headroom!
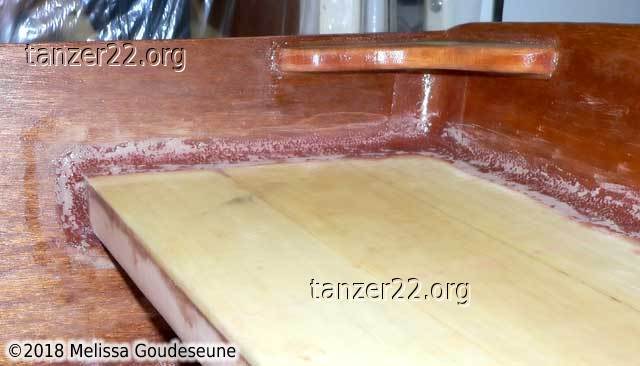
Once the seat was epoxied in place, we removed the green tape and epoxied
a fillet in the upper corner. This was preparation work for epoxying
strips of fiberglass over the seat/hull joint.
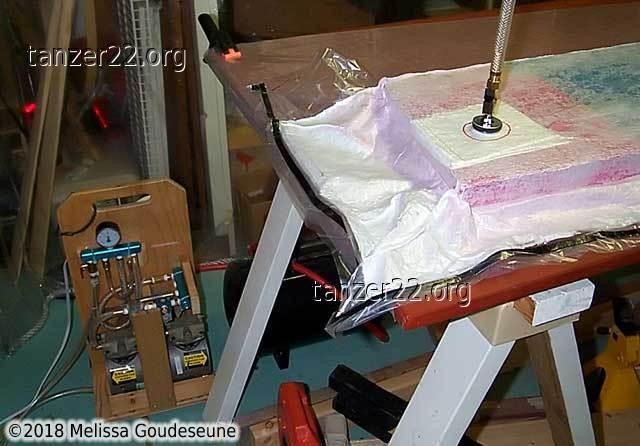
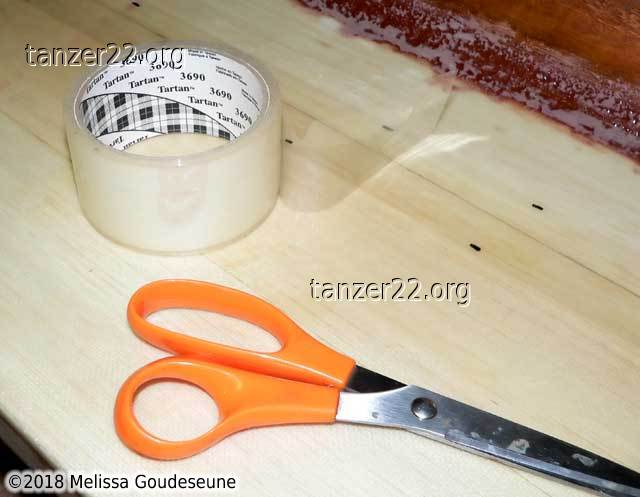
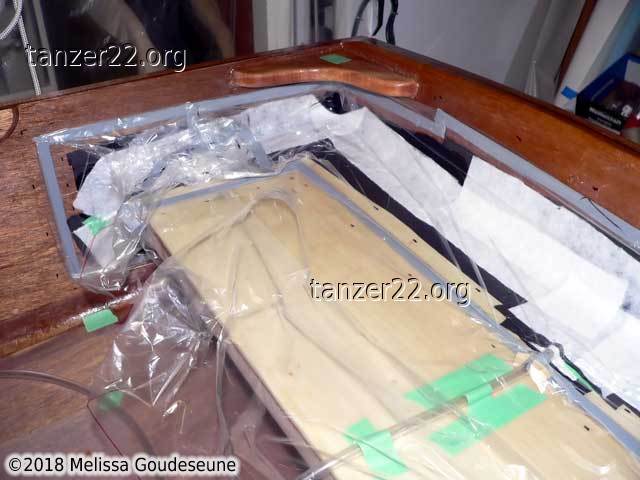
Surface Vacuum Bagging
The first preparation step of vacuum bagging onto a surface: applying tape
to the surface. Here, we used clear packing tape. The edge of the tape
was marked with a dotted line using a Sharpie marker. This made aligning
the butyl bagging tape much easier.
Next, the butyl bagging tape is applied around the perimeter, on top of the
clear packing tape. The paper backing is left in place for now, as the butyl
is VERY tacky.
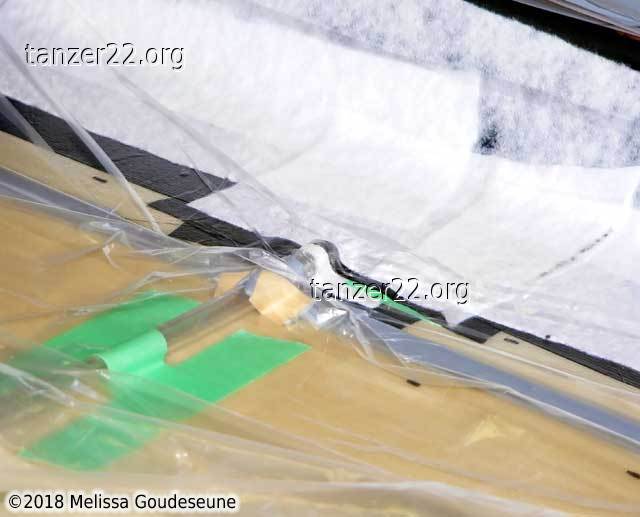
I opted to use a hose for the vacuum connection. A small piece of butyl
tape is formed around the vinyl hose, pressed into the corners with a
popsicle stick, and then the paper is placed on top again.
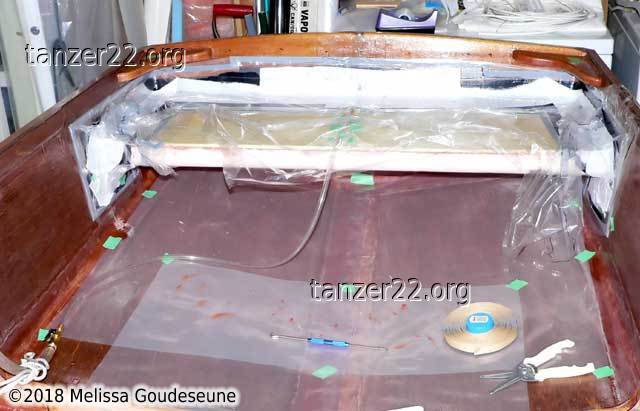
Bagging materials are test-fitted before starting with epoxy. The white
cloth is felt breather fabric. The black cloth is the nylon release
fabric. Also visible is the polyethylene bagging film under the seat.
The difficulty of working under the seat made it prudent to attach the
lower part of the bag ahead of time, without the time pressure of wet epoxy.
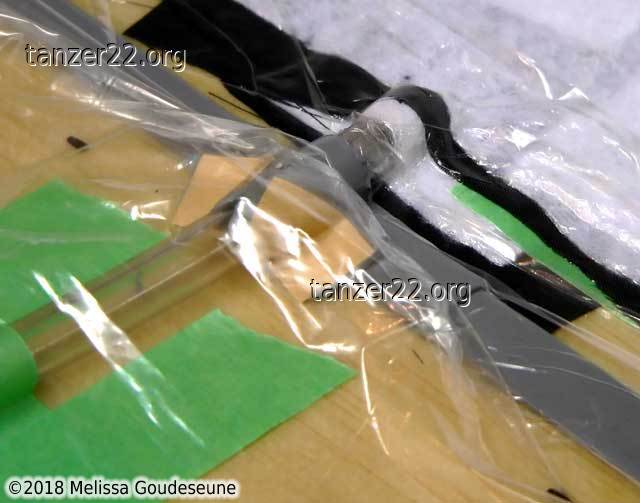
Here you see the completed vacuum bag with vacuum being pulled. The
most difficult part of this operation was making sure there was enough
slack in the vacuum bag, so that it could apply pressure right into the
corner. If the bag was too small, then it would "bridge" the corner,
and would not be touching the surface.
Two detail photos of the vacuum bag pickup. There is a small piece
of nylon and felt over the end of the hose, to keep epoxy out of the
hose, and to keep the bag from being sucked into the hose.
On this operation, I was able to pull 15" Hg, with about a 30% duty
cycle. This was less vacuum than when bagging the seat inside a vacuum
bag.
The dominant source of leakage was probably under the packing tape. Given
that this bagging operation had 14 linear feet of bag edge, I'm still
quite happy at being able to achieve this level of vacuum.
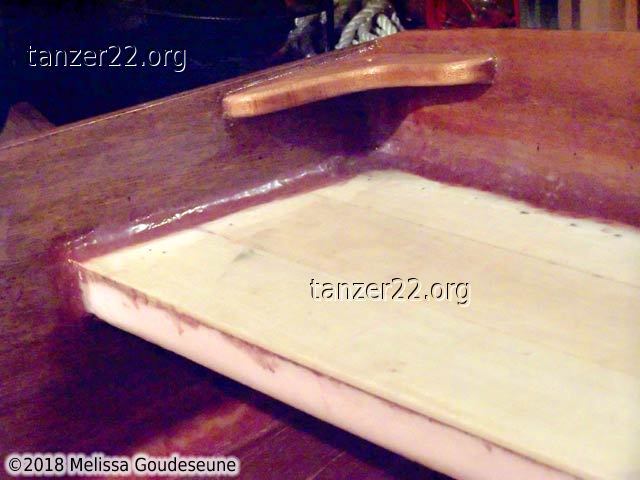
Aft Seat Complete
With the bagging materials removed, this is how the fillets and fiberglass
looked on the aft seat.
© 2018 Melissa Goudeseune