Forward/Centre Seat
As with the aft seat, I built the forward seat in a manner wildly different
from the plans.
The plans specify 3/8" ply, or two layers of 1/4" ply for the forward seat.
Given that the forward seat is the most frequently used, I figured that
one layer of the 1/4" ply would be a good idea for durability.
The strength would be made up by the foam and fiberglass skin.
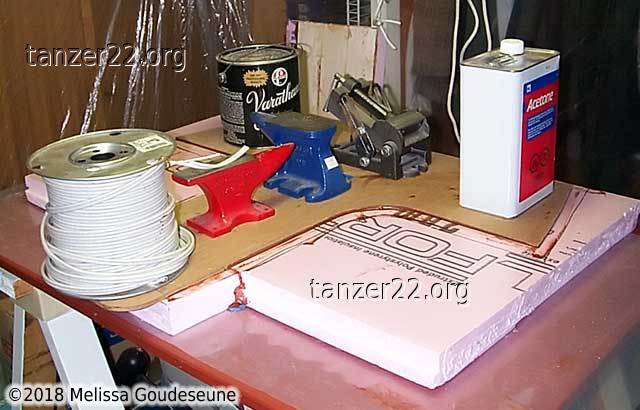
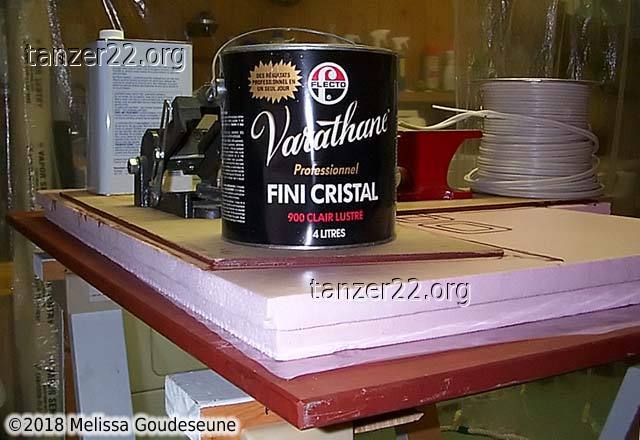
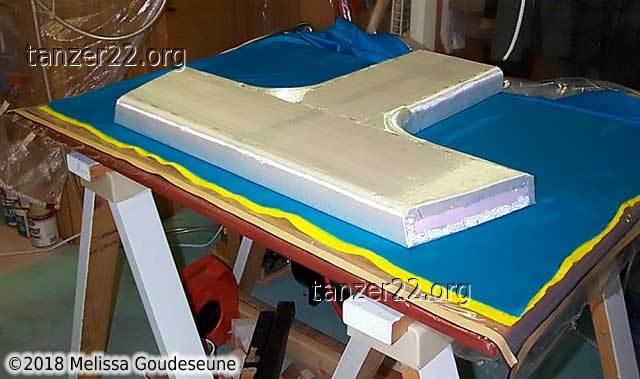
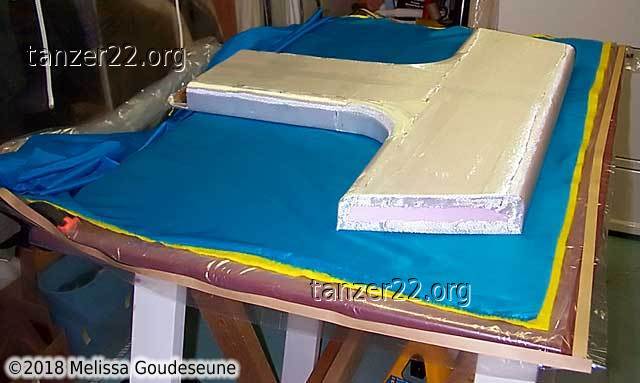
The first step was to laminate the 2" foam to the plywood. The foam and
plywood are both rather stiff, so weights were good enough to clamp them
together. The foam was installed oversize on all edges, and trimmed
afterwards. This avoided the need to do very precise positioning at this
stage.
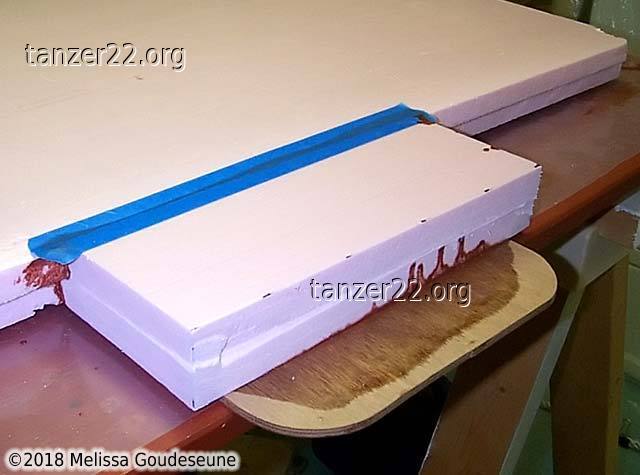
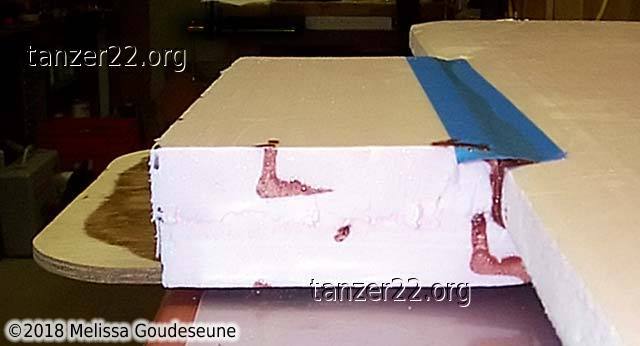
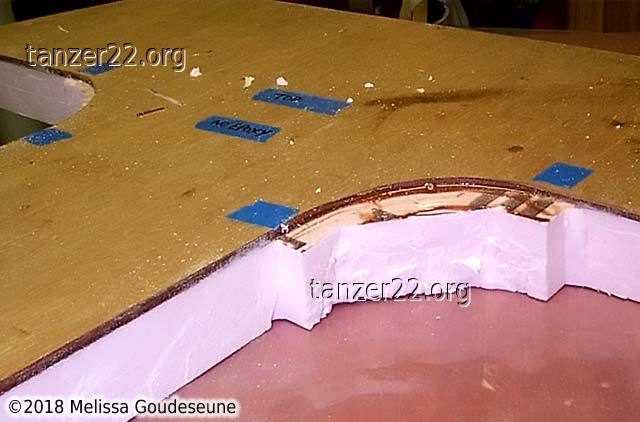
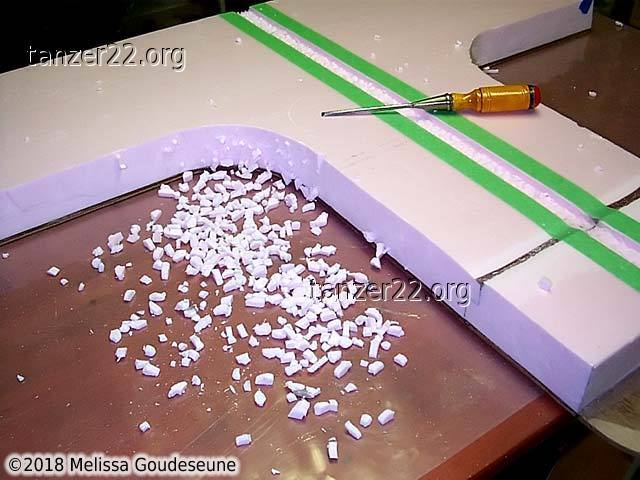
The foam only comes in sections that are 2' wide. Due to the size of the
seat, it was necessary to have a joint in the foam. Fortunately, the foam
has a step molded in, and I epoxied the entire mating surface for a solid
joint. The blue tape you see was at the bottom in the above photos, and
was placed to prevent the wet epoxy from running out the bottom of the
joint.
Trimming Foam
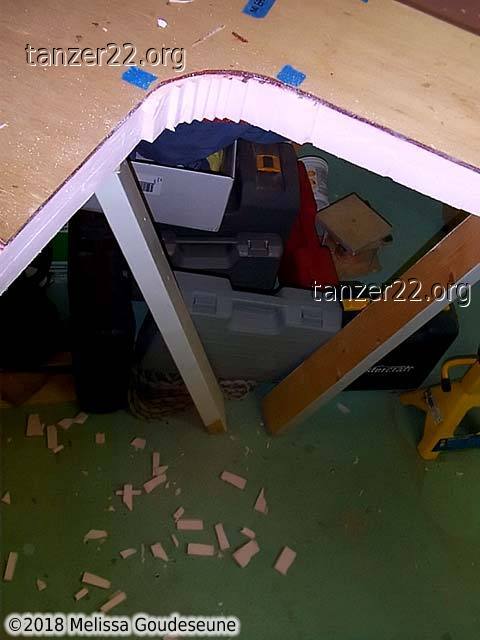
Once the epoxy had cured, I trimmed the foam to match the profile of the
plywood. This was all done using the Fein Multimaster using the
flush-cutting saw blade. The precise movement of the tool made cutting the
foam very neat and predictable.
The inside shoulder of the T was first cut to a rough profile, and then
nibbled away in small steps using the Multimaster. Final shaping was done
using the Multimaster saw blade as a rasp, pulling it very lightly
across the surface of the foam.
Seat Web Reinforcement
With the lower surface now being foam, a new concern was the top edge of
the seat web. This is the piece that runs lengthwise under the seat to
support it on the hull. A 1/4" edge might possibly cut into the foam over
time. To prevent this, I installed a 1" wide strip of plywood into the
bottom surface of the seat.
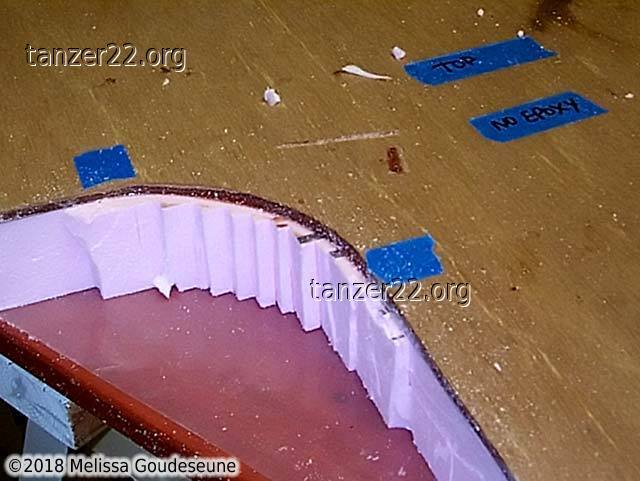
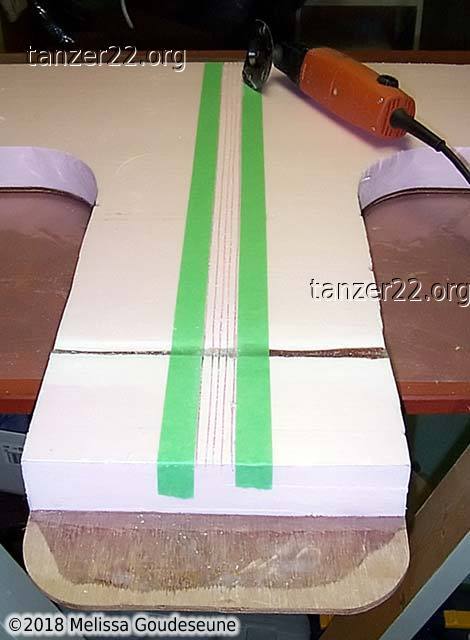
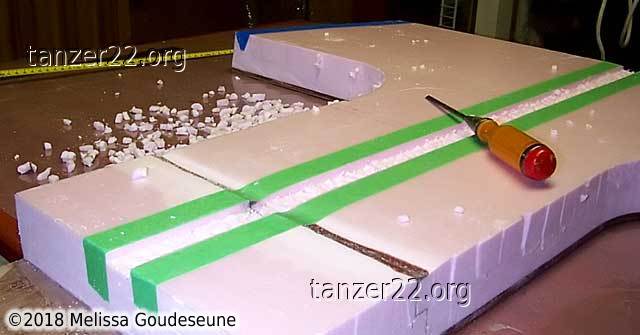
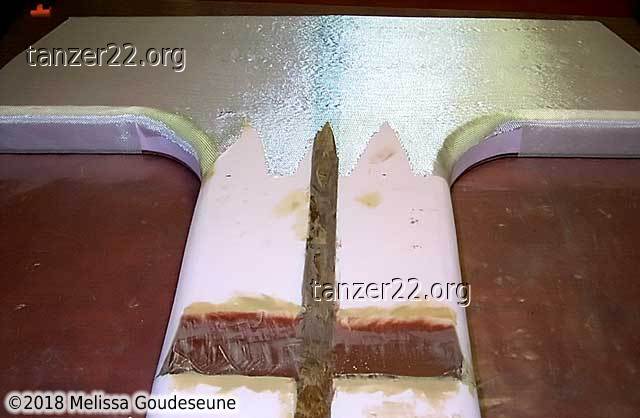
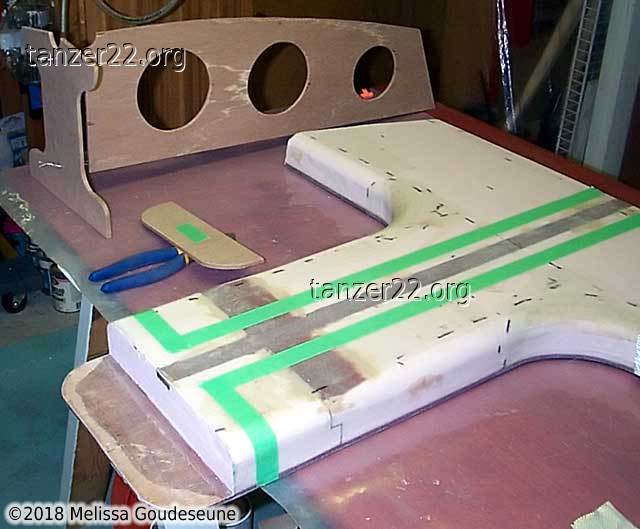
First, I needed to cut a slot 1/4" deep, 1" wide in the foam. I was
unwilling to use a router, as the potential for disaster was huge. Using
my Multimaster, I cut five slots into the surface of the foam. For scale,
the green tape is 1" wide.
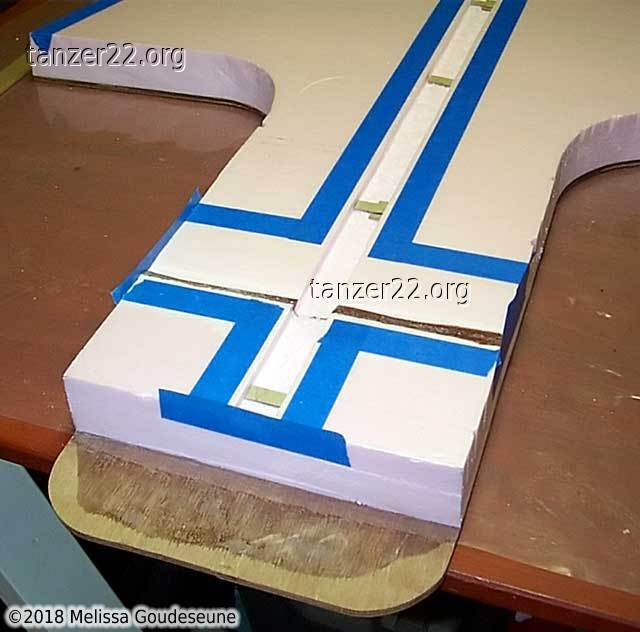
Next, I used a chisel to carefully gouge out the foam to the required depth.
Apparently, my chisel work was a bit too enthusiastic, as the slot was now
too deep in places. This was easily fixed with small cardboard shims.
Later, thickened epoxy would fill any remaining gaps.
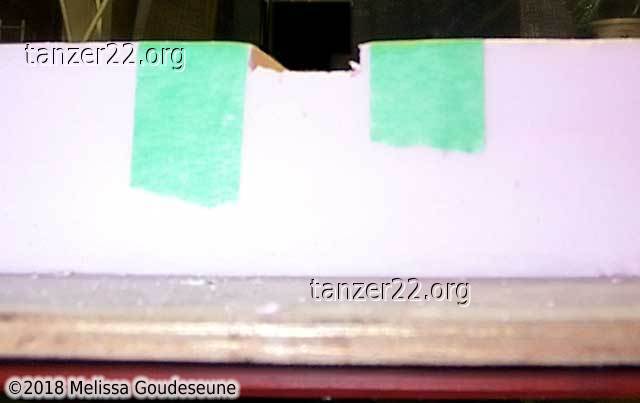
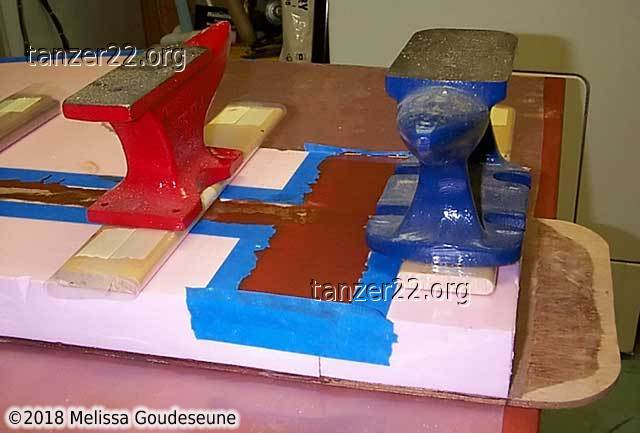
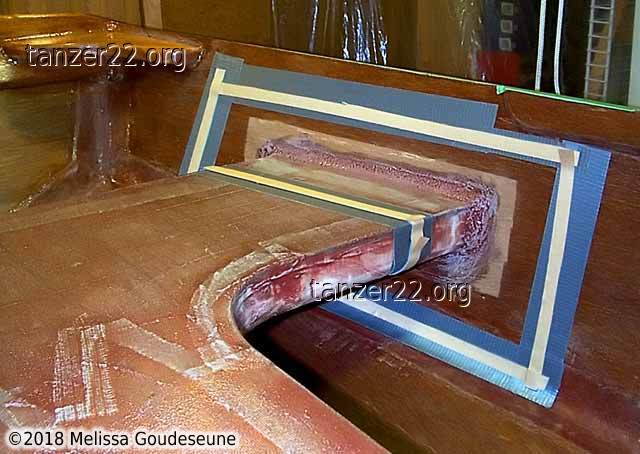
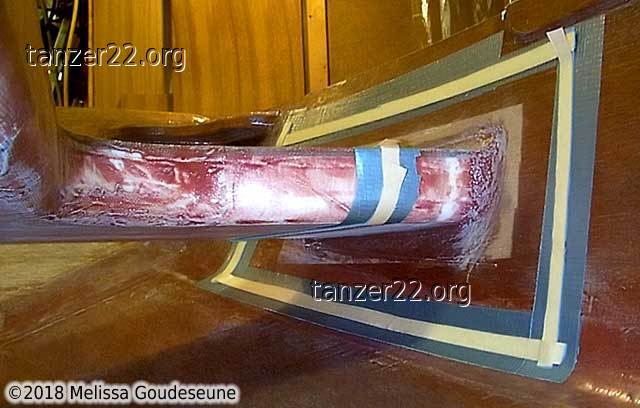
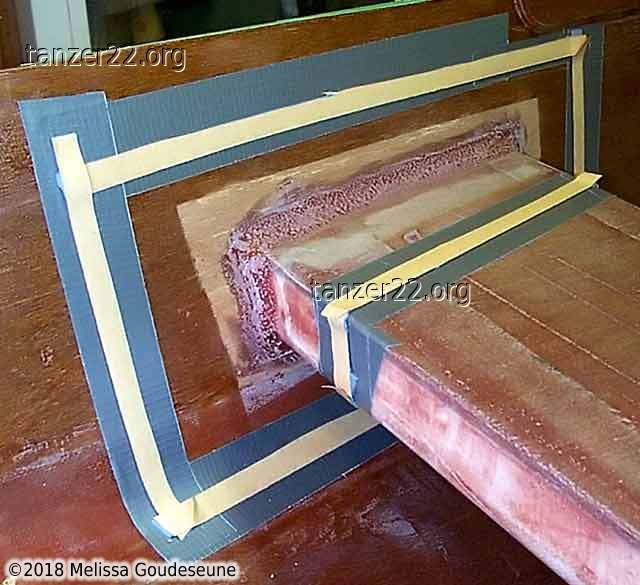
The wide masked part that looks like the hilt of a sword is a manufacturing
side-effect of the foam. As seen in photo 3, the foam is a bit
thinner at the joint. I used thickened epoxy to bring the profile back to
level.
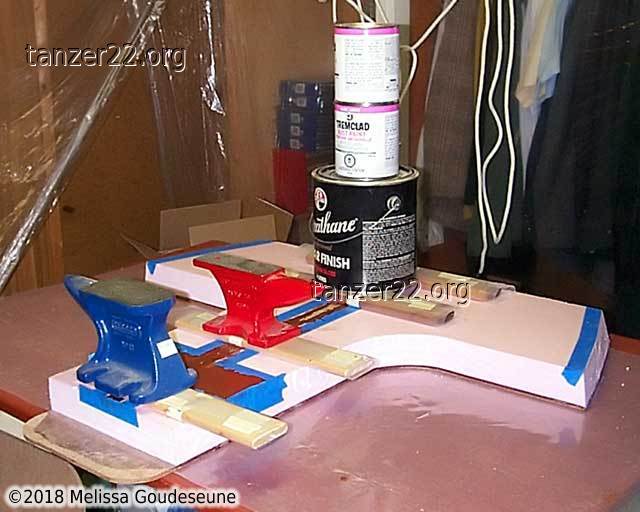
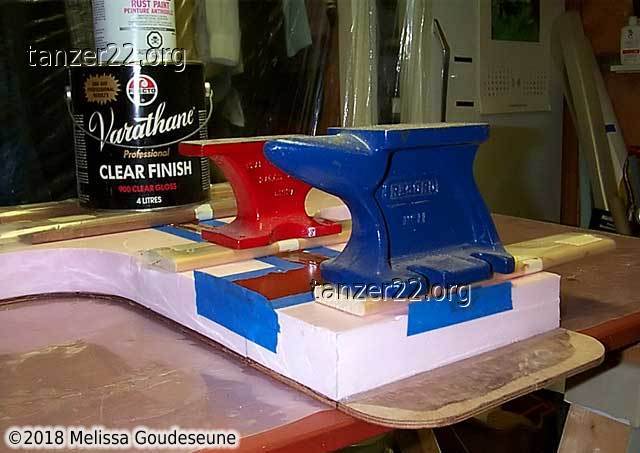
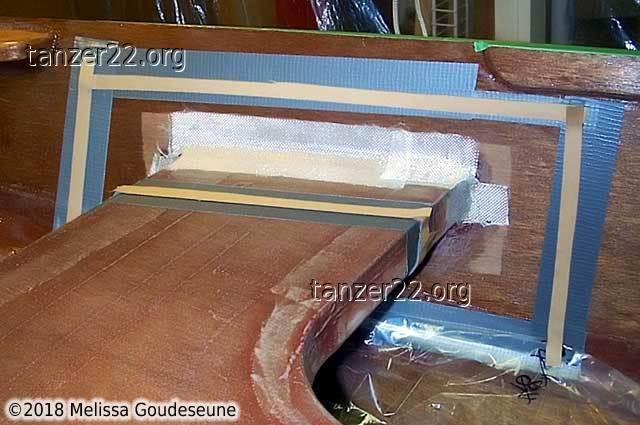
With the slot full of epoxy, the plywood now wanted to float to the surface
of the slot. I placed plastic-covered wooden slats across the seat to keep
the plywood level with the surface of the foam.
Shaping Foam and Plywood
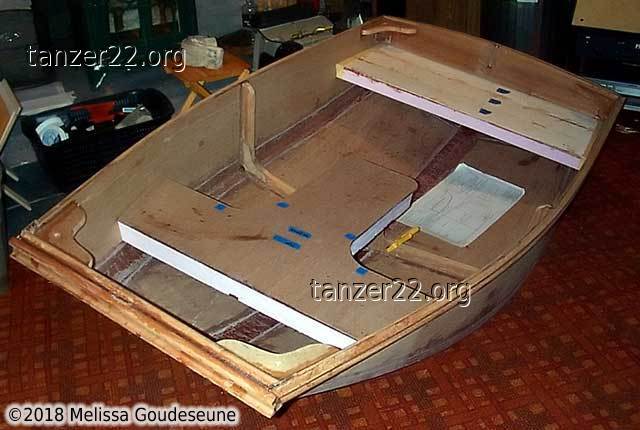
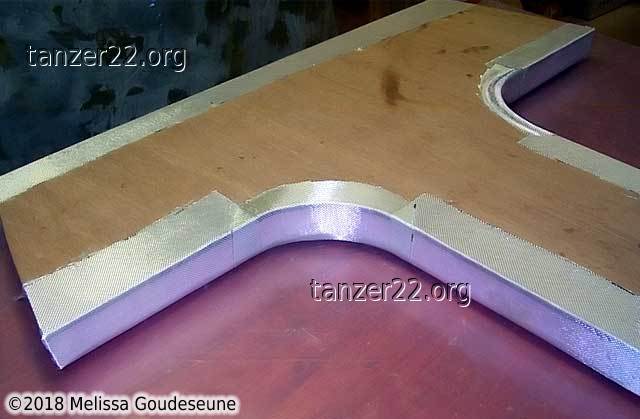
The forward edges of the foam were shaped to match the profile of the hull.
This required some very careful measuring and trimming. At this time, I
also marked the definite position of the seat at the inside of the hull.
The seat web did not perfectly line up with the hull and the forward seat.
I used a work lamp shining sideways to check the alignment. Working under
the seat is difficult, so I took lots of photos and viewed them on the
computer to see what to do. Another approach is to use a mirror, which I
did when painting the dinghy.
Others have also used a webcam and laptop for similar results.
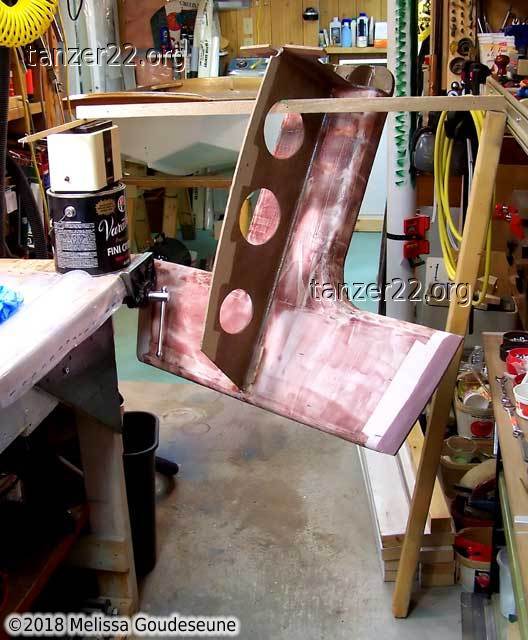
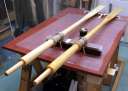
The profile of the seat web. Later, I cut three lightening holes in
the web. The horizontal ruler in the photo is 24" long.
The edges of the seat were radiused, similar to the aft seat.
The weight of the seat before applying fiberglass was 2100 grams.
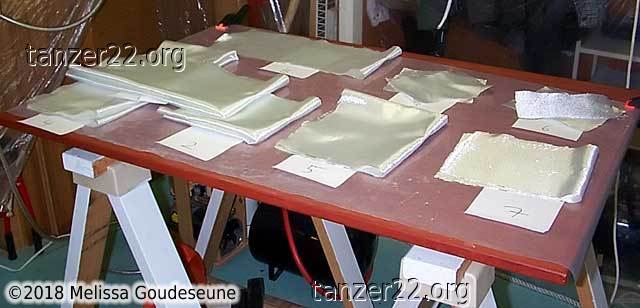
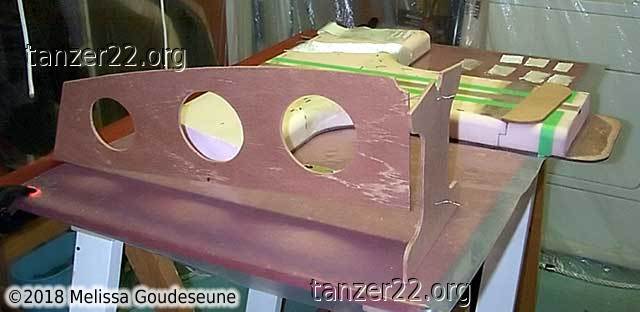
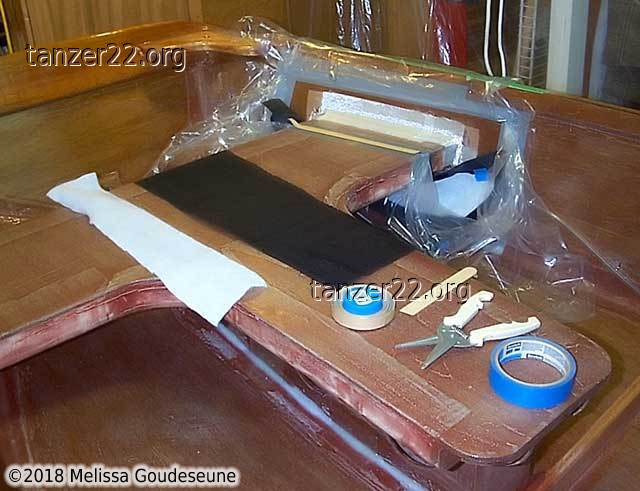
Fiberglassing
The forward seat is a much more complicated shape than the aft seat.
I used eight different parts of fiberglass on this seat. All the
fiberglass was cut to shape and laid out with numbered sheets to denote
the order of application. Next, they were placed in a small stack in
the correct order.
On this seat, I sprayed the 3M 77 contact cement onto the fiberglass, which
was then placed onto the seat. This made handling the fiberglass more
difficult. However, it was simpler than the alternative of some very
creative masking of the seat.
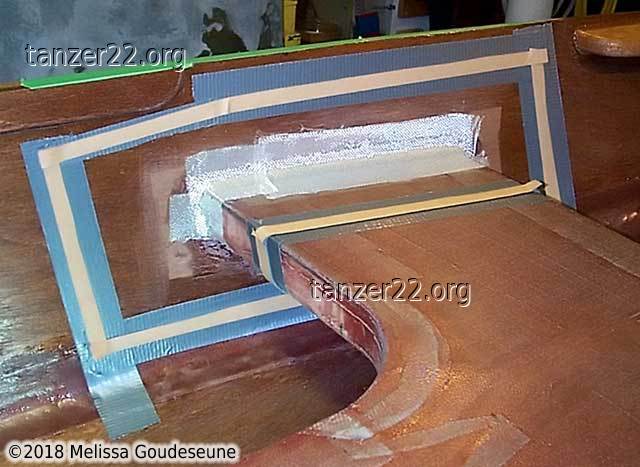
These photos show the incremental coverage as several layers of fiberglass
were applied to the seat. The sawtooth pattern in the fiberglass is to
prevent a ridge, or a stress riser, at the transition from the cross
section to the base of the T.
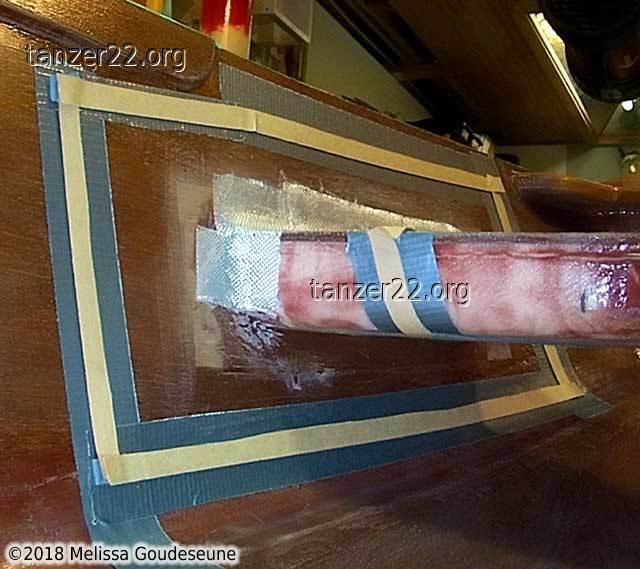
In the fifth photo, I trimmed the sawtooth too far, and ended up with a
too-small overlap between the main layers of fiberglass. I applied a
patch (visible in the red frame) where I had removed half of the lengthwise
yarns. This thinned the patch, and ensured that most of its strength was
in the short dimension.
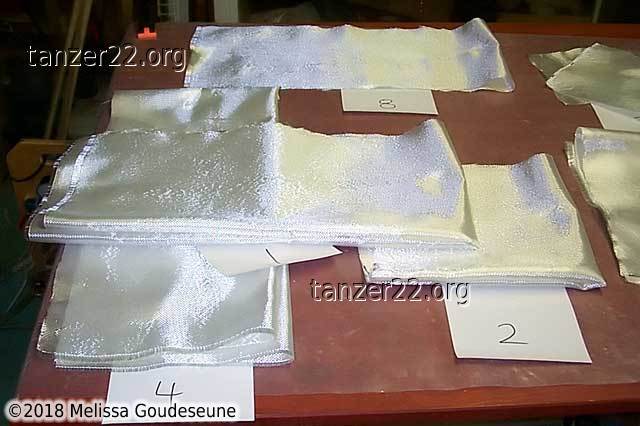
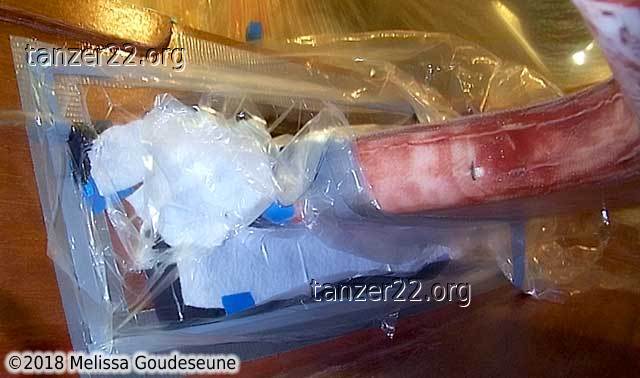
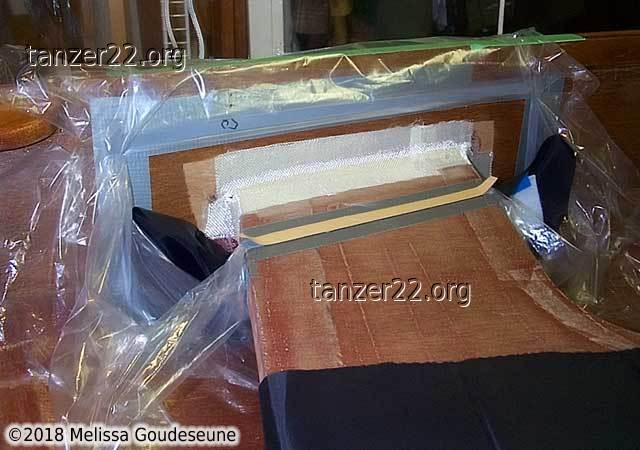
Vacuum Bagging
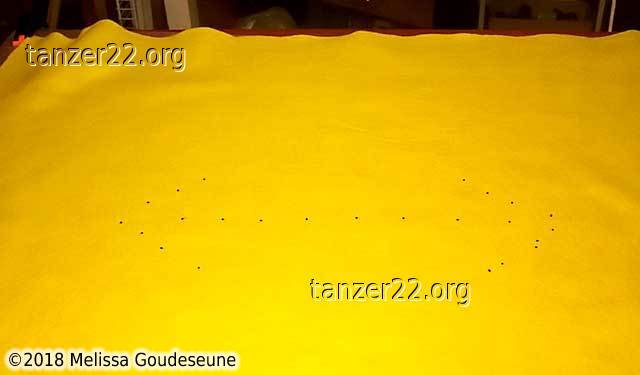
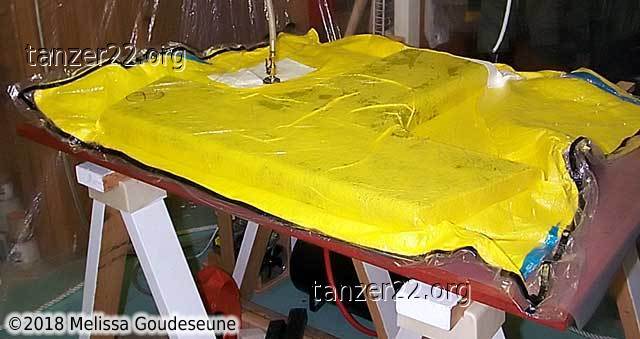
This was by far the largest vacuum bag I have yet done. The blue fabric is
nylon, which goes against the surface of the fiberglass. The yellow fabric
is felt, used to prevent captive air pockets in the bag, and to absorb
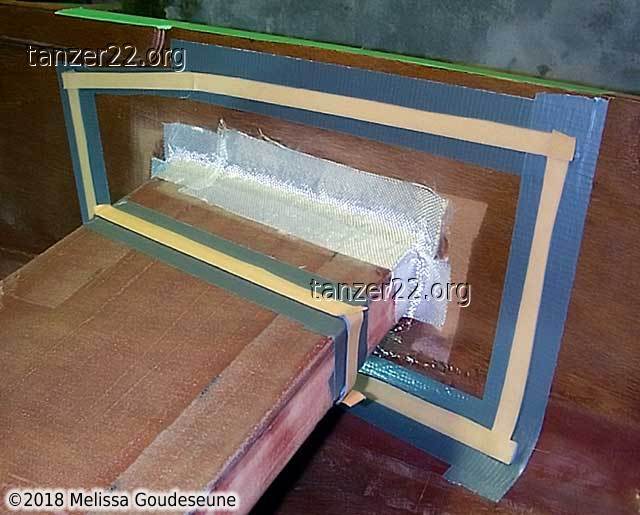
excess epoxy. Photo 2 shows the felt that will be placed on top
of the seat just before closing the bag. The arrow was marked to show that
it should be placed left-right on the seat.
Several views of the forward seat, just prior to epoxying. I made sure to
rehearse turning over the seat. After wetting out one surface with epoxy,
I turned it over and placed the wet fiberglass onto the blue fabric. At
that point, I could no longer lift the seat without making a BIG mess.
Hence, practice while things are still dry!
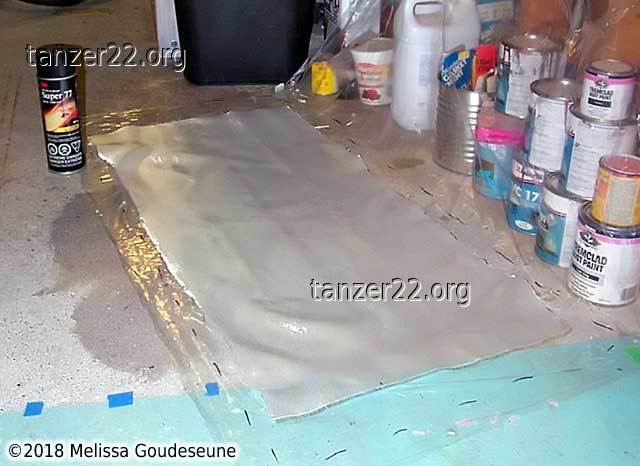
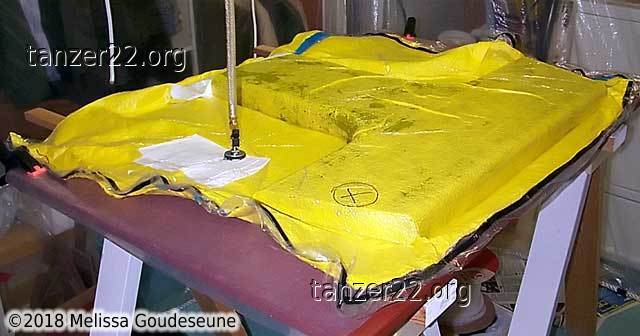
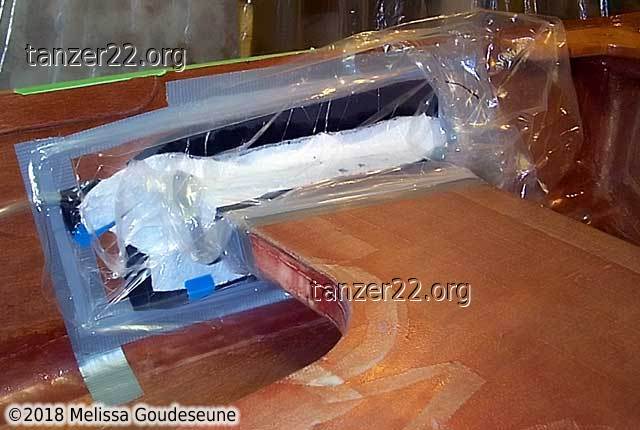
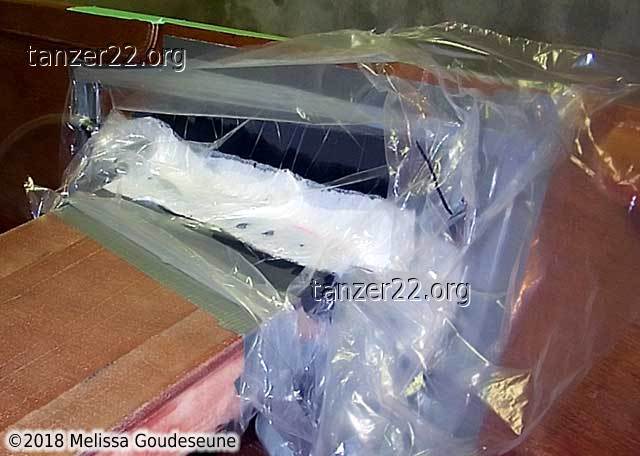
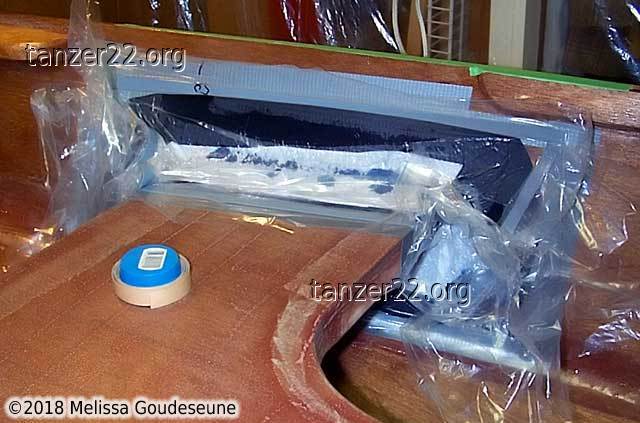
As usual, I have no photos of the epoxying, due to my hands being covered
in epoxy at the time. These photos show the the seat in the bag with
vacuum applied. The plastic is the thinnest vapour barrier I was able to
purchase from Home Depot. I prefer this to the thicker plastic as it is
better able to form to funny shapes.
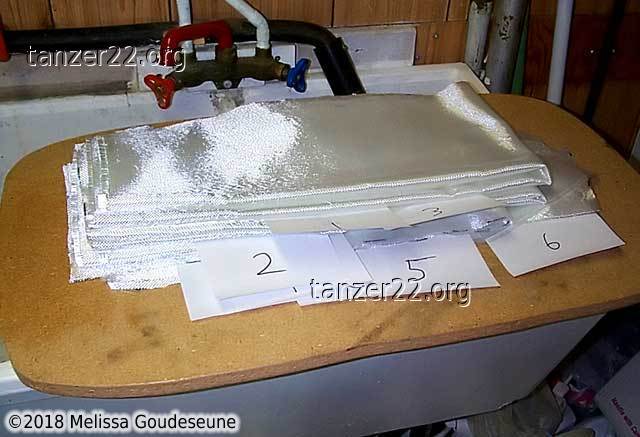
Photo 2 shows an X in a circle. When making a vacuum bag, I
always circle the hole where I place the vacuum pickup. Trying to find a
1/2" slot on a 3' x 4' sheet of clear plastic is an exercise in futility.
After I installed the vacuum pickup, I realized that it would be right at
the edge of the seat. I removed the pickup, covered the hole with packing
tape, and marked it with an X as unusable. I then made a new hole for the
pickup, which you see in the photo.
I was able to pull 24" Hg (24 inches of mercury) in this operation, which
is amazing given the size of the bag. This works out to a pressure of 12
psi. On the front seat's area of 540 square inches, that works out to 6480
lbs of pressure on the seat.
After the epoxy has cured, the seat is removed from the bag. It takes
significant effort to peel the fabric away from the fiberglass.
At this point, the seat weighed about 2525 grams. The breakdown was
2100 grams for the foam and plywood, 300 grams of fiberglass, and about
125 grams of epoxy.
For comparison, one sheet of 1/4" ply weighed 1400 grams, or 2800 grams
for the two layers. What I have here is much stronger, about 300 grams
lighter, and has 34 lbs more positive bouyancy.
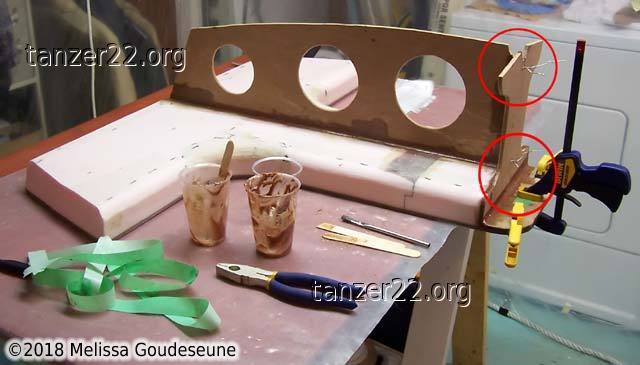
Seat Web Attachment
At this point, my sequence diverges from the plans again. Typical
installation is to install the seat web and gusset into the dinghy, and
then attach the seat to them. I decided to attach all the seat parts
together first on the workbench, where I could see what I was doing, and
I could easily align the parts.
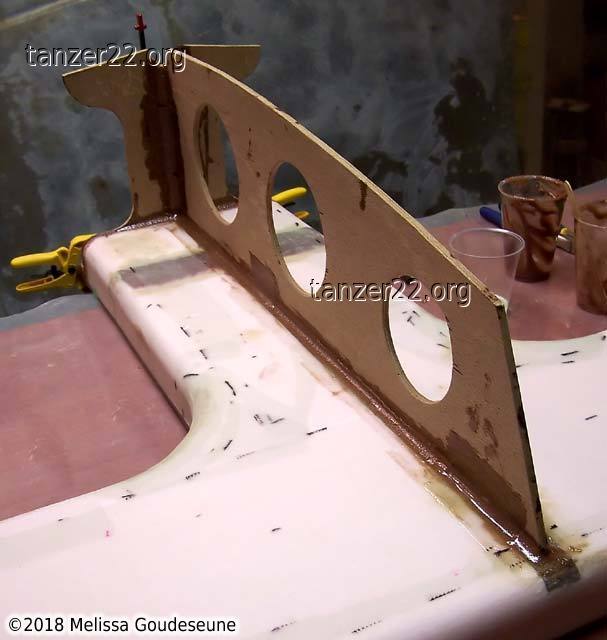
Three large holes were cut into the seat web. The web is still more than
strong enough, even so. The seat web is wired to the gusset with small
wire ties, the same way the hull was wired together initially. The wires
can be seen in the red highlights in photo 3. With everything test-fitted,
epoxy is applied to the relevant edges and the seat web is placed in position.
The small piece of wood on the pliers in photo 1 is all that remains of the
second layer of plywood. It is attached at the overhang of the seat, where
the foam stops.
The black marks on the seat are cutting marks on the fiberglass. This
is something to remember if a bright (i.e. varnished) finish is desired:
don't mark the fiberglass or any bagging materials with marker. The ink
WILL bleed through onto the workpiece.
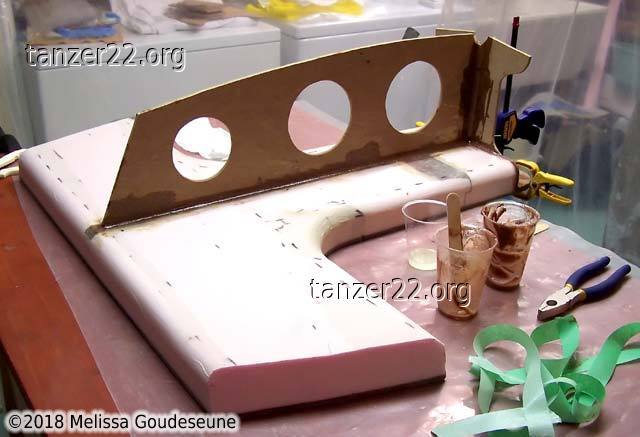
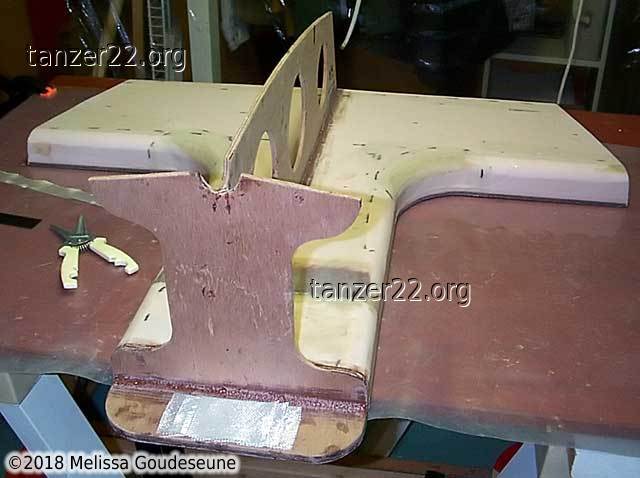
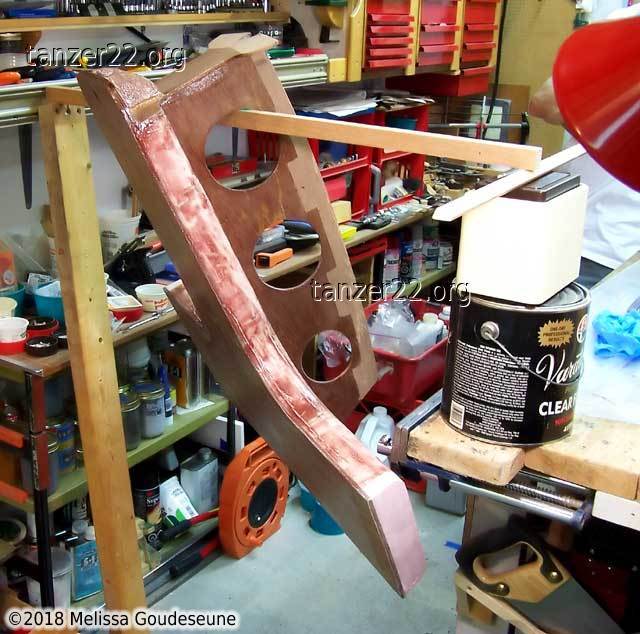
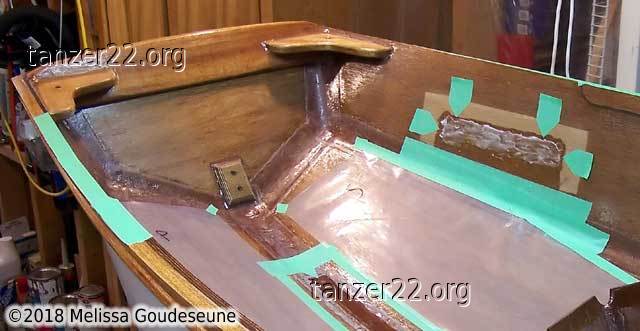
A few photos of the seat web and gusset installed. Photo 2 shows the bits
of fiberglass that help to stiffen the wood stiffeners which are visible in
photo 4.
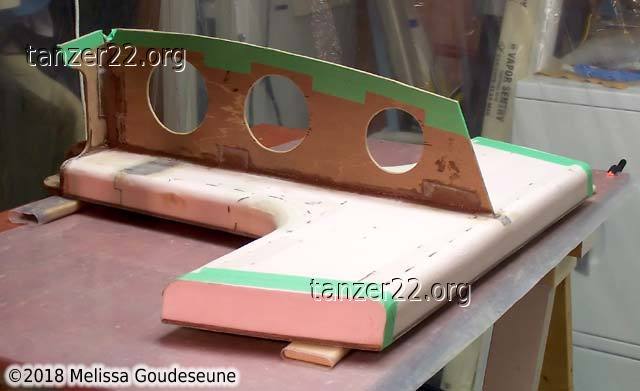
Photos 3 and 4 show the seat masked off for an epoxy coat (S1 Sealer on the
plywood) and a fill coat (EAST with microballoons on the fiberglass).
The parts covered with green tape are where the seat will be epoxied to the
dinghy.
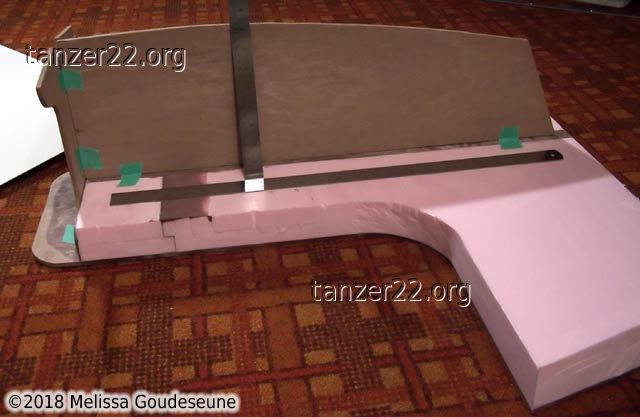
The final seat weight was too much to be weighed directly with my kitchen
scale, so my brother Camille devised this setup to calculate the real
weight based on a smaller measured value.
We came up with a calculated weight of 3350 grams for the seat, as
installed in the dinghy. I would be most curious how much these parts
(front seat, seat web, and seat gusset, with cleats) weigh when built as
designed to the plans. If any builders would like to email me the numbers,
I'll happily update this page with the details.
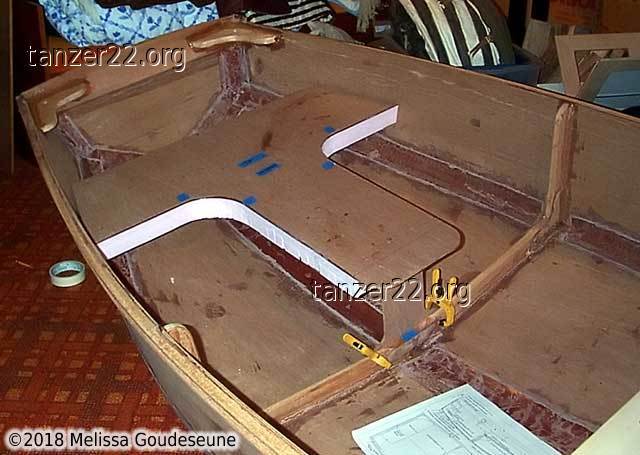
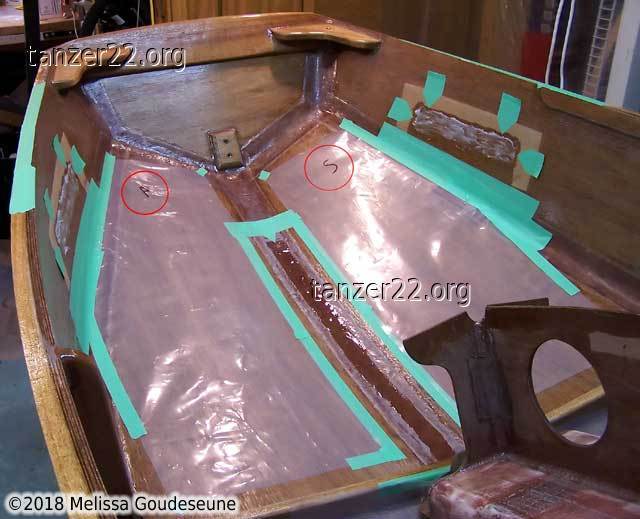
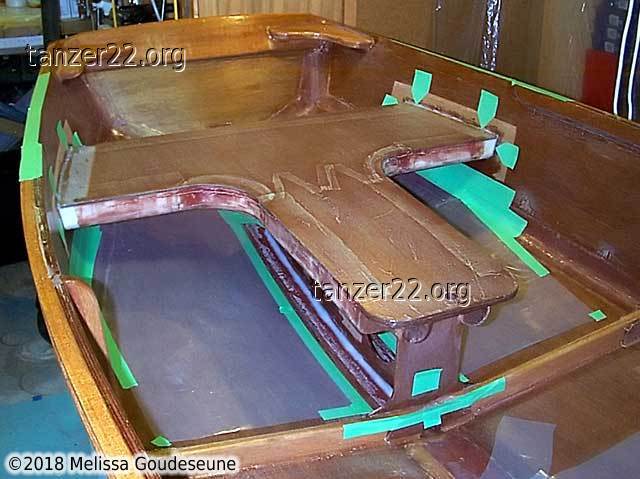
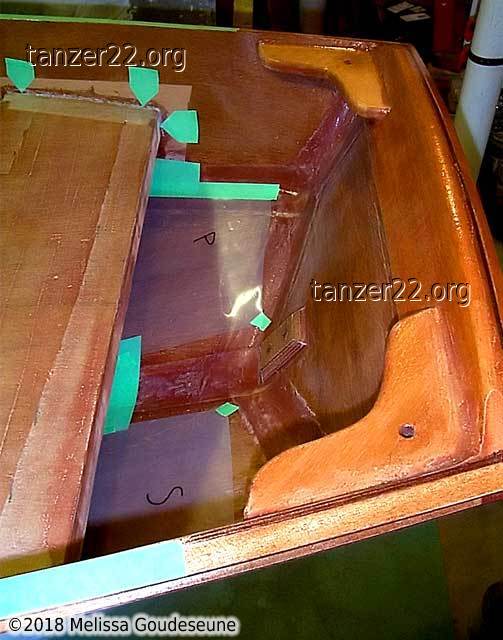
Forward Seat Installation
Preparation for installing the forward seat was very similar to the aft
seat. Green pointed arrows are alignment marks for all parts of the seat.
Plastic sheeting on the bottom makes cleanup easier. The two plastic
sheets were cut out independently, which is why they're marked P and S for
Port and Starboard.
Thickened epoxy has been applied to the various mating surfaces. Typical
mix was 1 fl oz epoxy, 1.5 fl oz milled fiberglass, 1 fl oz cabosil. It's not
visible here, but this is another advantage of an epoxy log. Every time I
open epoxy, I write down the date and time, how much was mixed in what
proportions, and what I was working on. I did this work almost a month
ago, but it only took me 2 minutes to look it up. I can't remember fussy
details like this a month later, or sometimes even an hour!
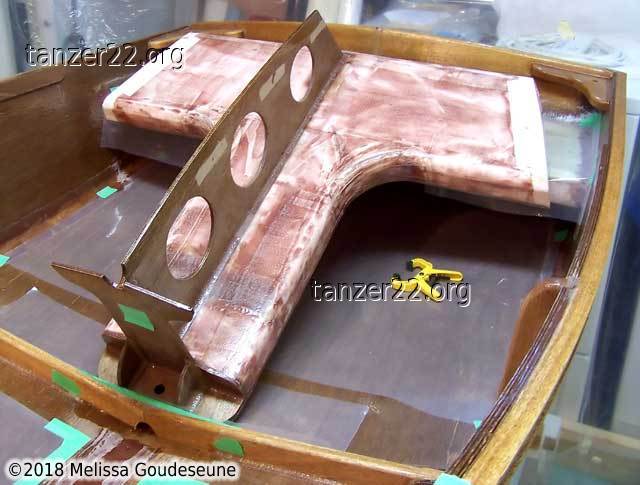
This is an overview of the forward seat, just before installation. Camille
and I practiced rotating it into position before opening epoxy. This felt
like learning a new step in a bizarre waltz. Four hands definitely made it
easier to install. As a result, we placed it correctly on the first try.
Teamwork is not to be underestimated!
The yellow clamp is lying ready for clamping the seat gusset to the center
frame. Note also the green tape at the top edge of the gunnel, in case of
epoxy drips while working on the forward part of the seat.
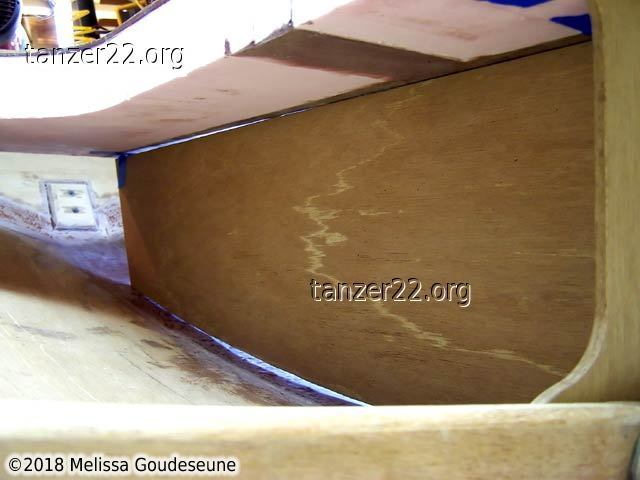
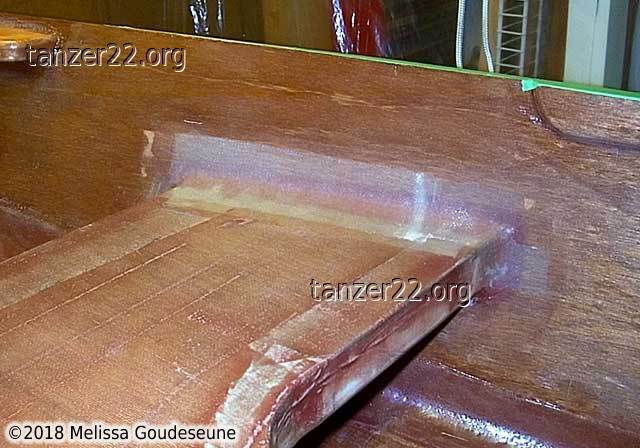
The forward seat, installed. A fillet was made at the bottom of
the seat web, as there would only be a few small bits of fiberglass on
that part. No fillet was put on the forward parts of the seat yet, as the
epoxy would obscure the green alignment marks while the epoxy was still wet
(and the seat was still prone to being bumped out of alignment).
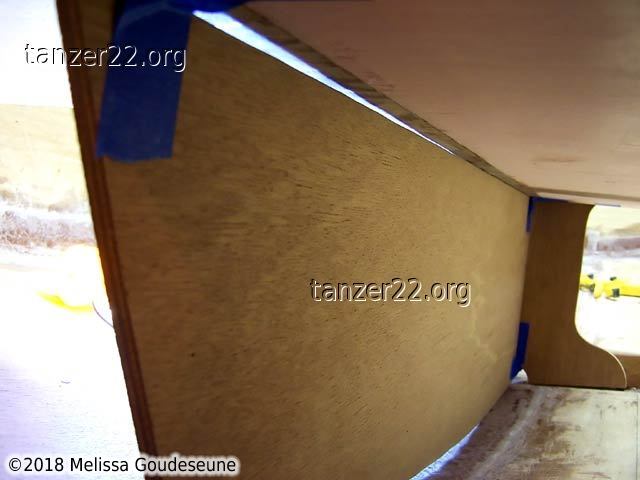
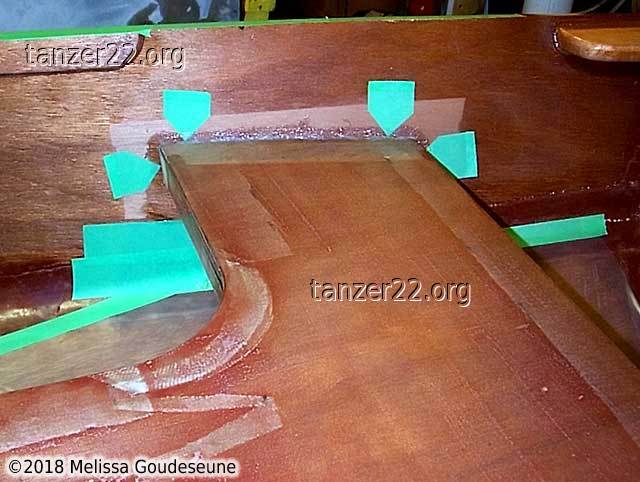
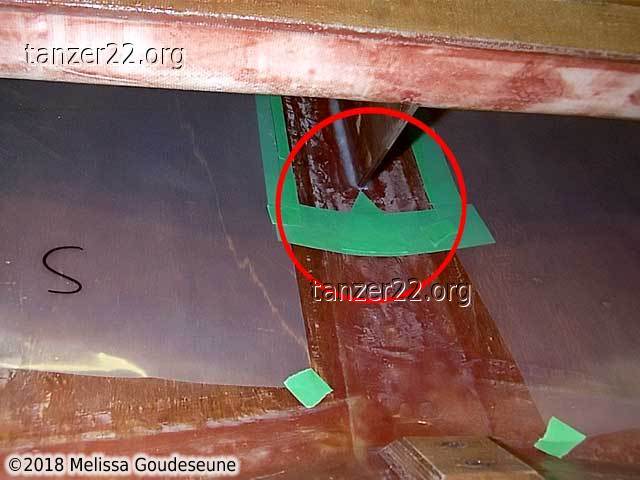
Detail photos of the alignment marks, including the front edge of the
seat web.
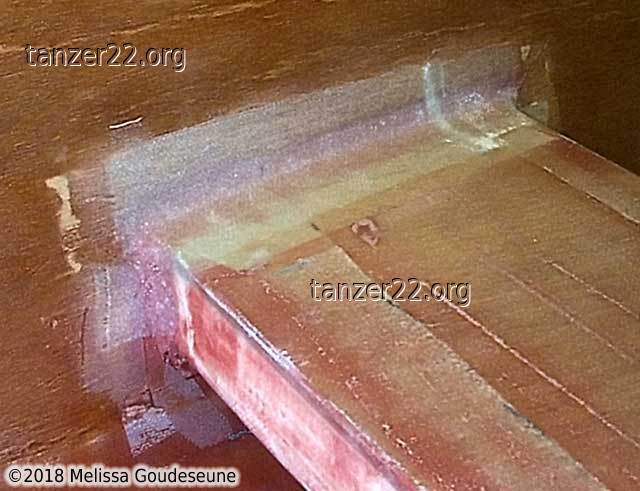
Surface Vacuum Bagging
The port side was the first to have the fiberglass tabbing installed.
At this point, the fillet has been epoxied in, and the fiberglass placed
with 3M 77 spray adhesive.
I decided to use duct tape against the surface, to see if it would hold a
better vacuum than the packing tape. It did (18" versus 15") but still
with a 30% duty cycle (18 seconds on, 36 seconds off). There was one large
benefit to the duct tape: it left less residue when removed. I had a few
sections of packing tape that left residue which needed to be removed with
solvent.
This is the vacuum bag with vacuum pulled. This was my most difficult
vacuum operation to date, as the entire bag was on an inside corner. This
made bridging a critical problem, and sealing the bag was an exercise in
creativity to make sure there was plenty of slack. I used the same
hose pickup design as with the aft seat.
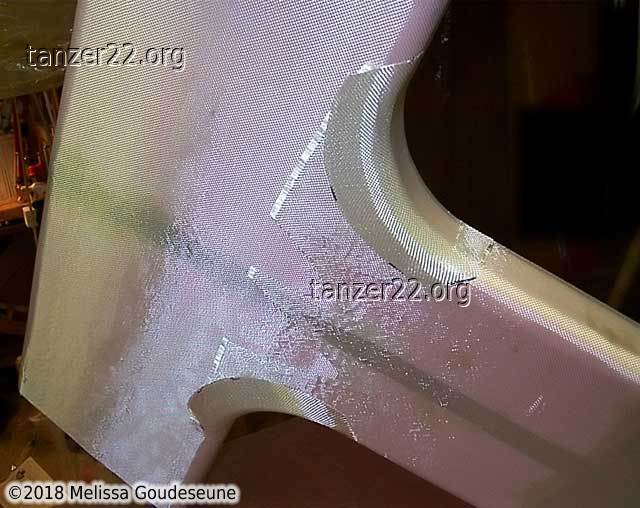
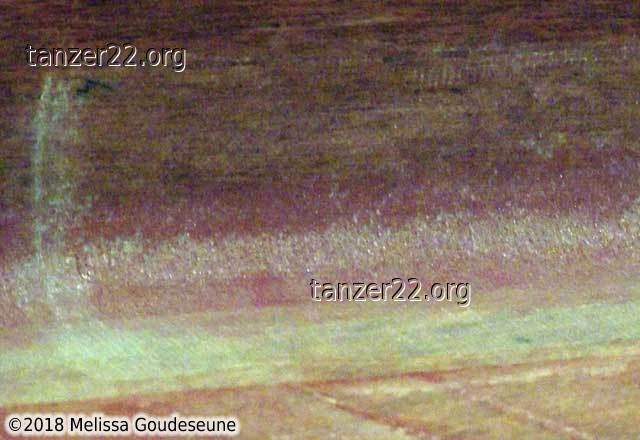
What the fiberglass looked like after removing the vacuum bag. All
that's been done is a VERY light sanding of the edge. Amazingly, the
fiberglass as seen in photo 2 is thinner on the surface than the fill
coat of epoxy.
Comparing these fillets to the chines of the dinghy (my first fillets,
done 2.5 years previous) is enlightening. The chine fillets went in quickly,
but required a fill coat and LOTS of scraping and sanding to make them
smooth. The vacuum-bagged seat fillets required LOTS of preparation
work and messing about with the vacuum bag. However, once the bag came
off, they were VERY smooth, and virtually ready for paint.
It appears that the total amount of work is the same, it's just a matter
of when you do it. In future, I would much rather vacuum bag all
the chines, to save myself the effort of sanding and scraping until my
arms want to fall off!
The starboard side was next to be completed. These photos show the duct
tape and butyl tape applied, and the epoxy fillet prior to applying
fiberglass.
Fiberglass tape was placed using 3M 77 spray adhesive.
Bagging materials are ready to be applied. The black release fabric
and white breather cloth have already been placed in the lower part
of the bag. As well, all the bagging film has been initially placed.
All that remains is to fold the top half of the bag onto the seat, and
seal up the two seams at the fore and aft edges of the seat.
Vacuum pulled on the starboard side. The bunched-up plastic is from
matching up the two halves of the bag (bottom and top) so they don't
leak.
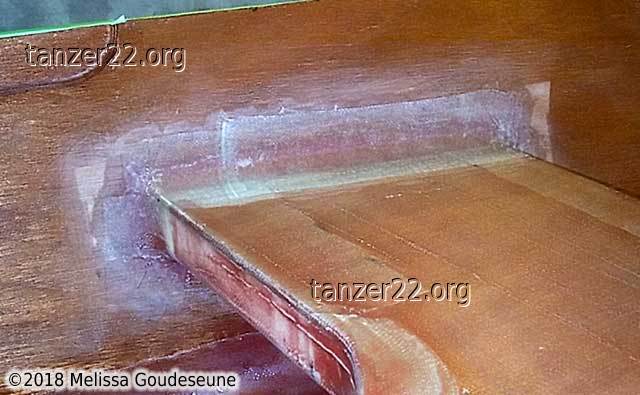
The final result, just after removing the vacuum bag. No sanding has
been done at this point.
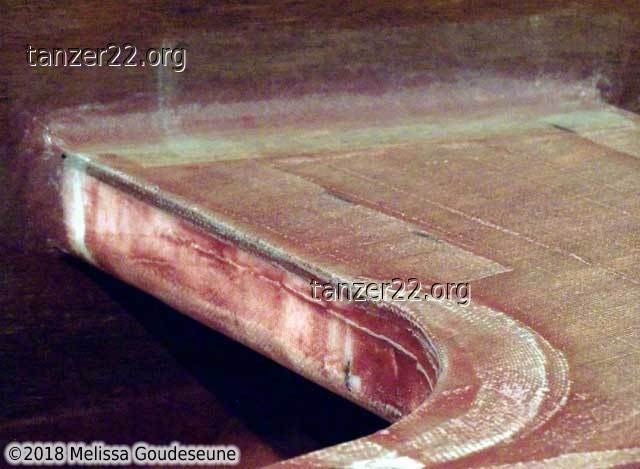
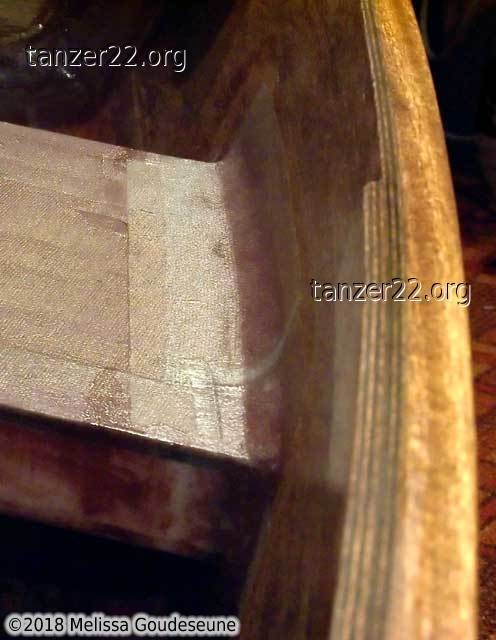
Detail Photos
It's not easy to photograph fiberglass that's well-nigh flush with the
surface it's epoxied to. However, here are a number of photos showing
various detail closeups of the forward seat fillets. First, the port side,
looking across the boat.
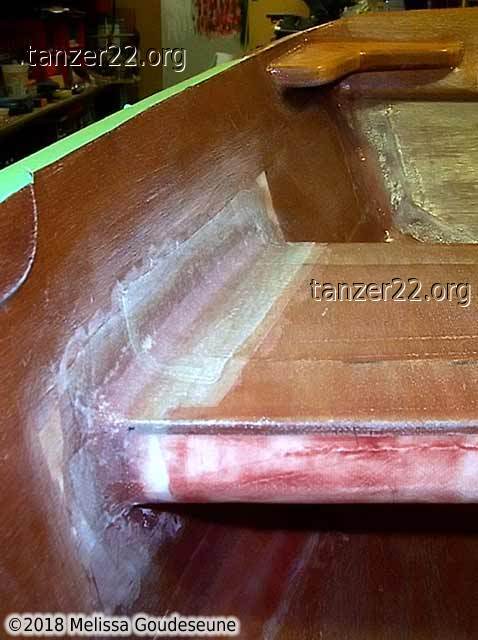
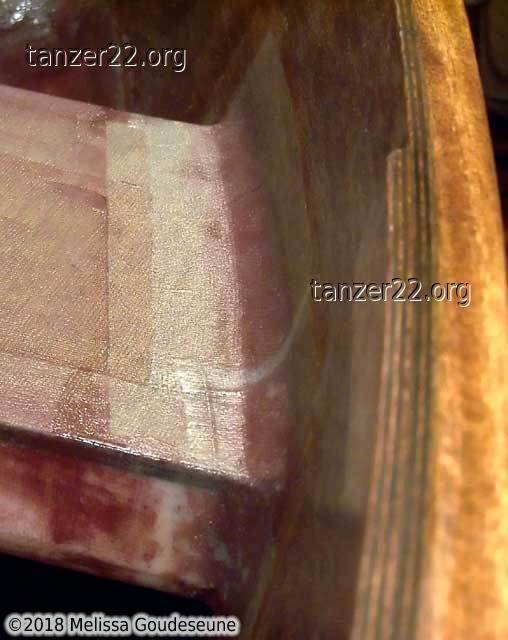
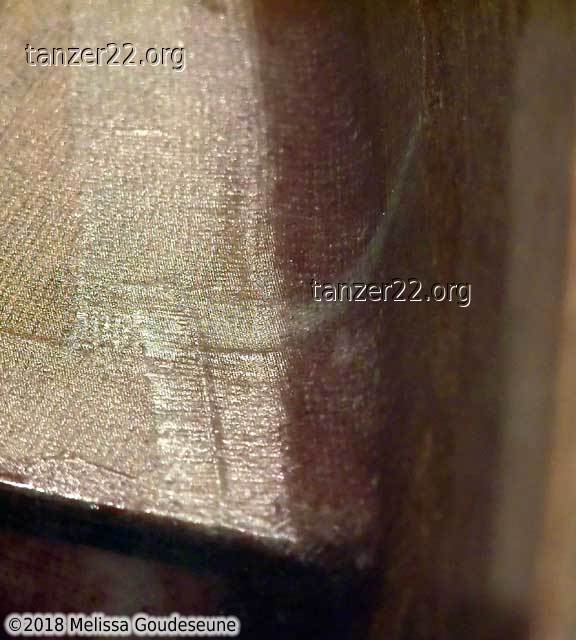
Next, six images showing the staboard fillet, looking forward along the
side of the dinghy.
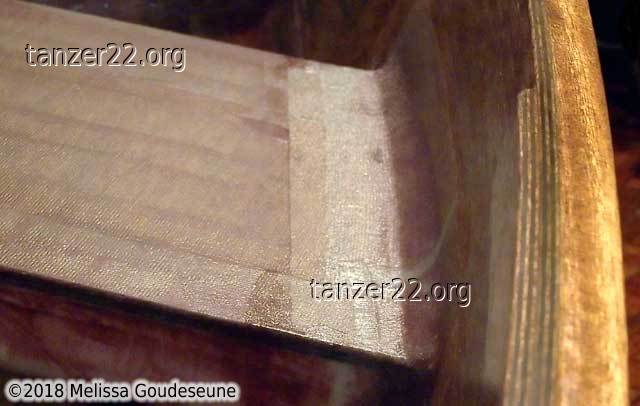
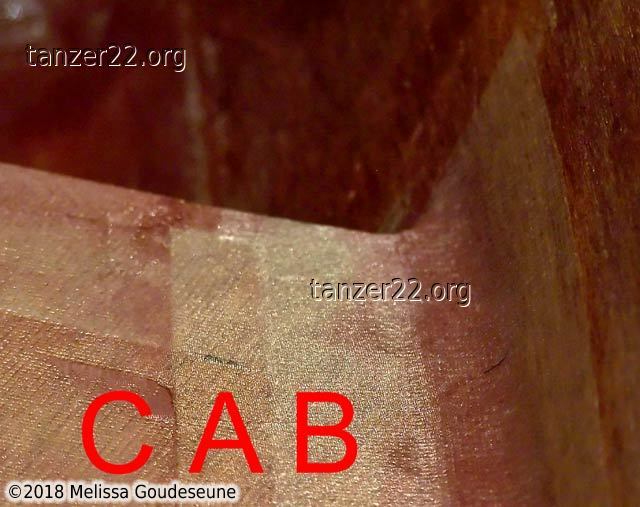
This photo with a legend shows how effective the vacuum bagging is. In
order of increasing thickness:
- A: one layer of fiberglass, vacuum bagged
- B: two layers of fiberglass, vacuum bagged
- C: one layer of fiberglass, vacuum bagged, and a fill coat of epoxy &
microballoons, sanded
© 2018 Melissa Goudeseune